Integrating a Plug-In with a Shortcuts Workflow
The following example action demonstrates the abilities of Omni Automation and OmniFocus to integrate seamlessly with the Shortcuts application.
This example action automates the process of taking a picture, attaching it to a new OmniFocus task, which is then added to an existing project chosen by the user when the action is executed.
These series of steps are accomplished by an Omni Automation action that prompts the user to choose an OmniFocus project, then executes a Shortcuts worklow, and processes the workflow results.
The Shortcuts Workflow
The corresponding Shortcuts workflow is designed to perform a device-related procedure (take picture) that currently cannot be accomplished using Omni Automation itself. Once the workflow has been triggered by the OmniFocus plug-in, and a picture has been taken, the built-in OmniFocus Shortcuts actions are used to create a new task that includes the taken picture as an image attachment. The workflow finishes by returning the unique task identifier string to the calling plug-in.
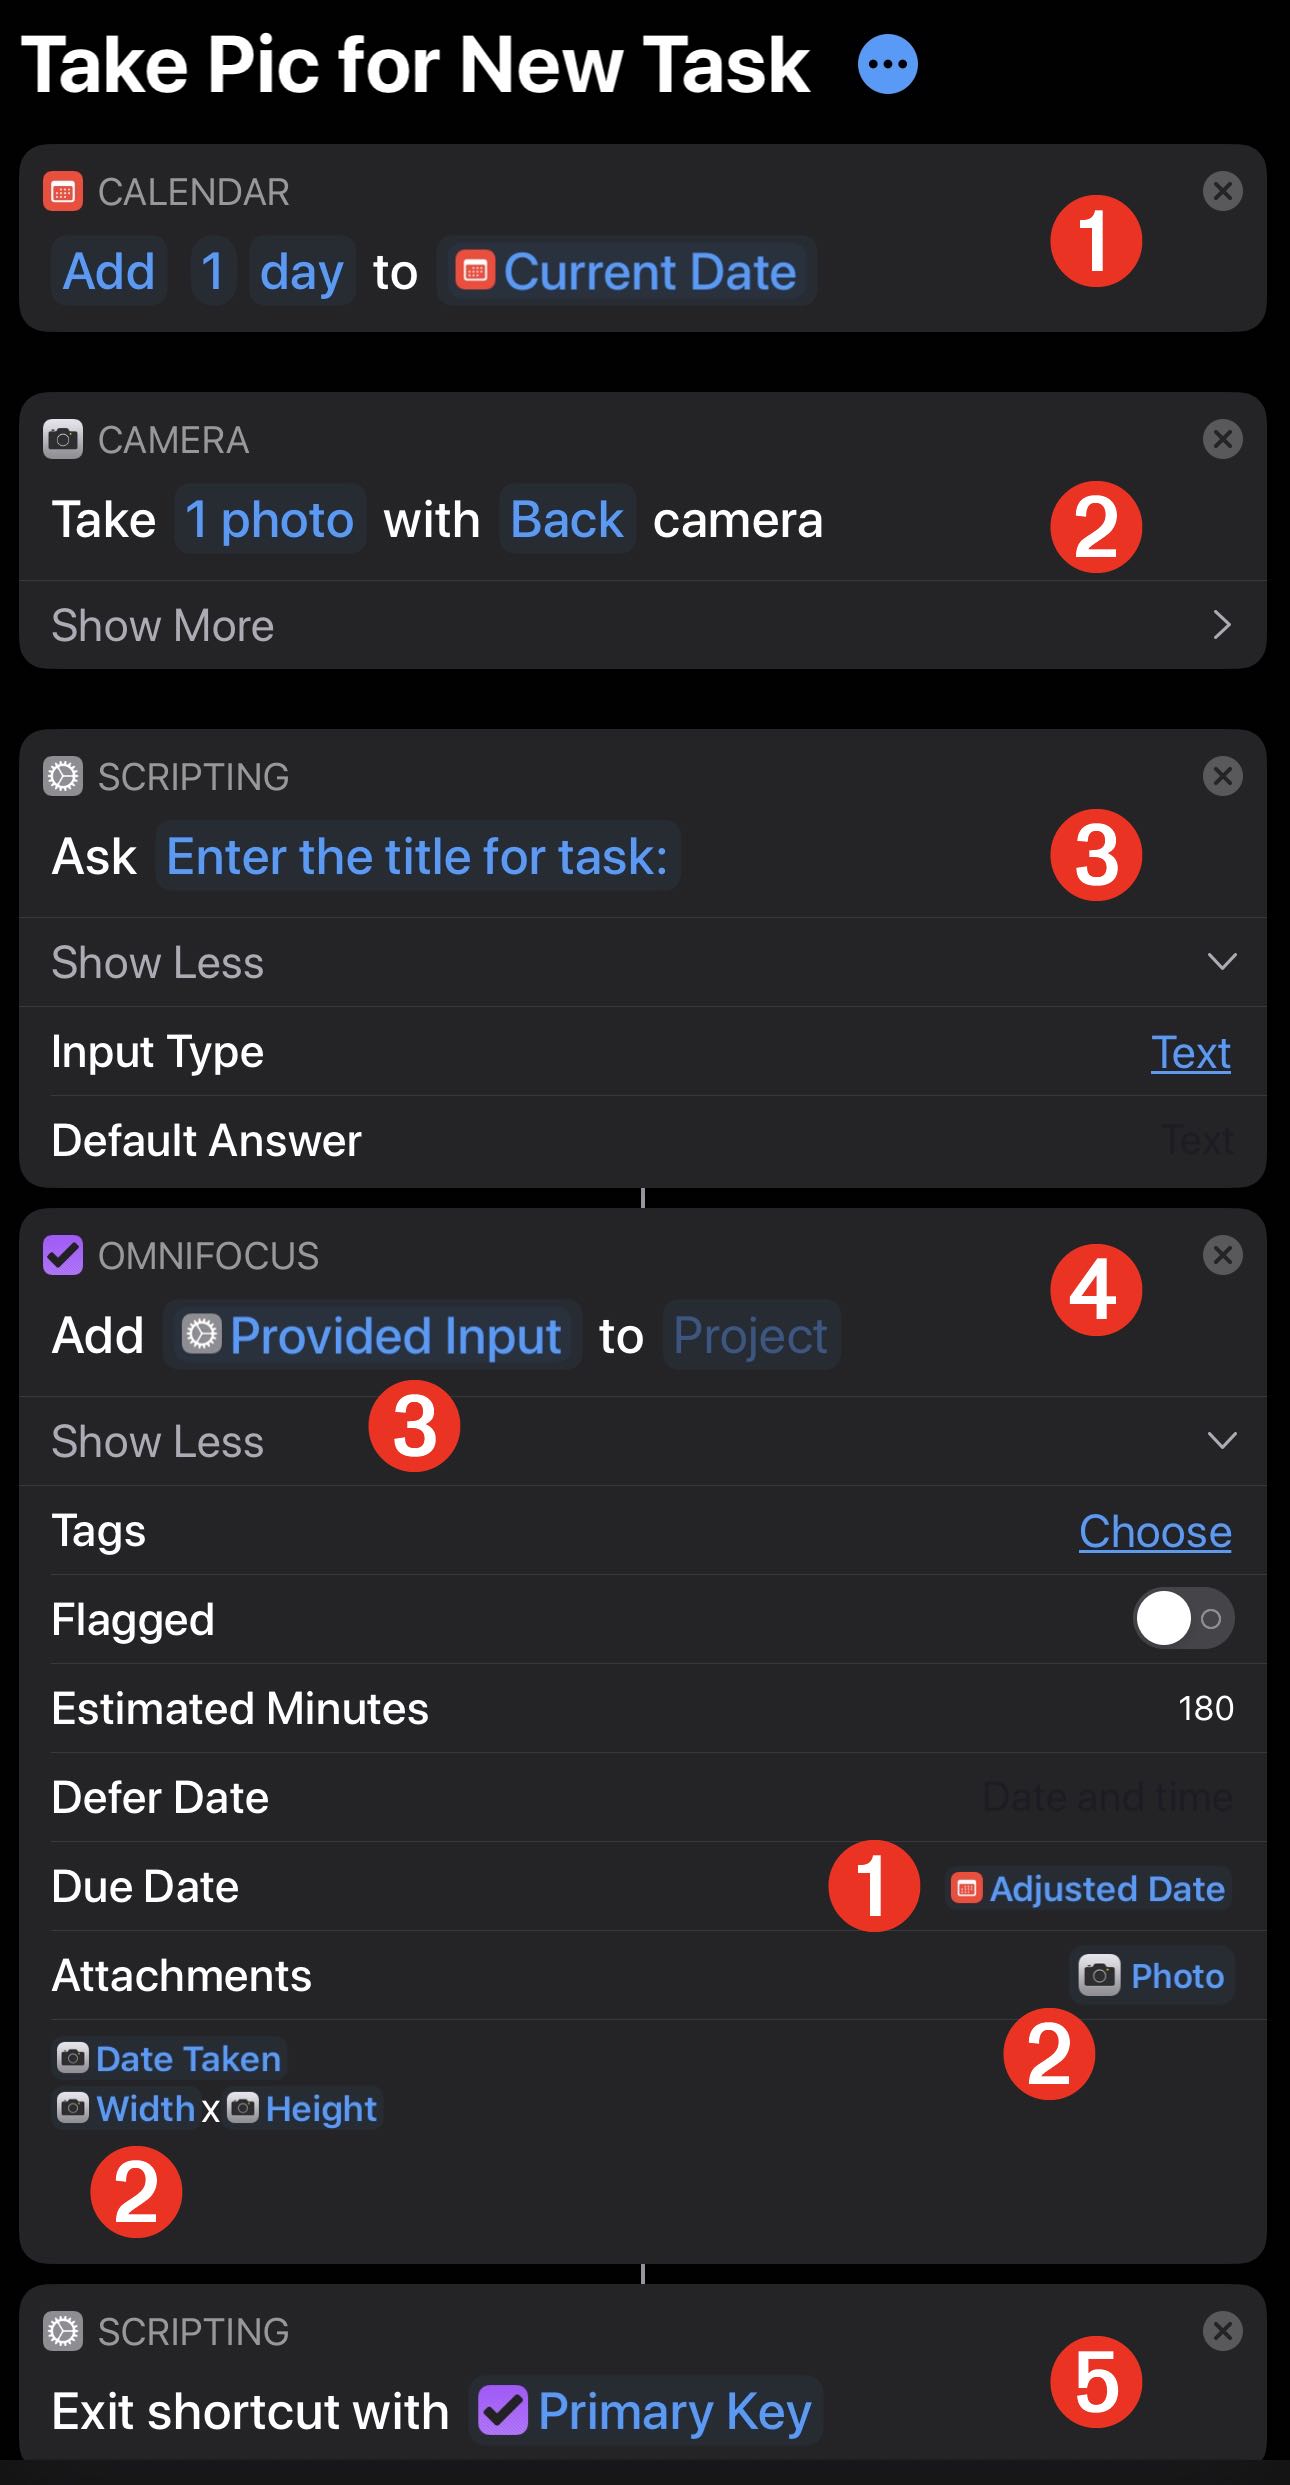
CLICK|TAP to install the “Take Pic for New Task” workflow.
|
(1) This action will create a date object that is one-day after the current time. The resulting date is used as the value for the task’s Due Date property. (2) This action triggers the device camera to take a picture, that is added as an attachment to the created task, with related metadata added to the Notes field for the created task. (3) This action displays a text input for entering the desired title for the task. (4) The OmniFocus “Add Item” action creates the task using the provided values from the other actions. (5) The “Exit Shortcut” action stops the workflow, returning the value of the primaryKey property of the created task. This key will be used by the Omni Automation plug-in to identify the newly added task. |
The OmniFocus Action
The “Take Pic for New Task” action incorporates some of the advanced features of Omni Automation, such as:
Action Forms — to display a menu of projects tagged as being “Camera-Ready” to the user so that they can choose the project targeted to receive the new task with image attachment.
Call-Back URLs — to execute a corresponding Shortcuts workflow that performs a device procedure (take picture), creates a new task, and then passes the resulting task ID to the calling action function.
Call-Result Processing — to use the task ID passed by the workflow to identify, manipulate, and select the task created by the called workflow.
A line-by-line description of the relevant sections of the action code are listed before and after the action plug-in code displayed below:
(Description for the action code shown below)
(01-10) The action metadata
(17-29) Check for the “Camera-Ready” tag and display the corresponding error message if the tag does not exist.
(31-35) Get a list of all projects tagged with the “Camera-Ready” tag and if there are none, display the corresponding error message.
(37-43) Sort the projects alphabetically by title.
Calling a Shortcuts Workflow
/*{"type": "action","targets": ["omnifocus"],"author": "Otto Automation","identifier": "com.omni-automation.of.take-pic-for-new-task","version": "1.1","description": "This action will trigger the execution of a Shortcuts workflow that uses the device camera to take a picture and attach it to a new task, which is added to the chosen project that has been tagged with the tag: “Camera-Ready”","label": "Take Pic for New Task","shortLabel": "Take Pic for New Task","paletteLabel": "Take Pic for New Task","image": "camera.on.rectangle"}*/(() => {const action = new PlugIn.Action(async function(selection, sender){try {targetTagName = "Camera-Ready"targetTag = nulltags.apply(function(tag){if(tag.name == targetTagName){targetTag = tagreturn ApplyResult.Stop}})if(!targetTag){var errMsg1 = "There is no tag titled: ”" + targetTagName + "”"throw new Error(errMsg1)}projectsWithTag = targetTag.projectsif (projectsWithTag.length === 0){var errMsg2 = "No projects are tagged with: ”" + targetTagName + "”"throw new Error(errMsg2)}projectsWithTag.sort((a, b) => {var x = a.name.toLowerCase()var y = b.name.toLowerCase()if (x < y) {return -1}if (x > y) {return 1}return 0})projectNames = projectsWithTag.map(project => {return project.name})projectIndxs = new Array()projectNames.forEach(function(name, index){projectIndxs.push(index)})projectsMenu = new Form.Field.Option("projectMenu",null,projectIndxs,projectNames,0)inputForm = new Form()inputForm.addField(projectsMenu)inputForm.validate = function(formObject){return true}formPrompt = "Choose a “" + targetTagName + "” project:"buttonTitle = "Continue"formObject = await inputForm.show(formPrompt,buttonTitle)// THE CHOSEN PROJECTprojectIndex = formObject.values['projectMenu']chosenProject = projectsWithTag[projectIndex]// THE TARGET WORKFLOWworkflowTitle = "Take Pic for New Task"workflowTitle = encodeURIComponent(workflowTitle)urlStr = "shortcuts://run-workflow?name=" + workflowTitle// EXECUTE THE URLURL.fromString(urlStr).call(function(reply){// EXPECT TASK PRIMARY KEY AS RESULTtaskID = replyconsole.log("Task ID: ", taskID)// DELAY PROCESS FOR IMAGE TO COMPLETE IMPORTTimer.once(3, function(timer){// IDENTIFY THE TASK OBJECTallTasks = flattenedTaskstargetTask = nullfor (i = 0; i < allTasks.length; i++){task = allTasks[i]if (task.id.primaryKey === taskID){targetTask = taskbreak}}if (targetTask == null){throw Error("Task not found.")}// ADD TAGS (OPTIONAL)itemTags = []itemTags.forEach(targetTagName =>{targetTag = nulltags.apply(function(tag){if(tag.name == targetTagName){targetTag = tagreturn ApplyResult.Stop}})tag = targetTag || new Tag(targetTagName)targetTask.addTag(tag)})// MOVE TASK INTO PROJECTmoveTasks([targetTask], chosenProject)// SHOW THE TASKtaskURL = "omnifocus://localhost/task/" + taskIDURL.fromString(taskURL).open()}) // timer end}, function(callError){throw callError})}catch (actionError){new Alert("ERROR", actionError.message).show()console.error(actionError)}});action.validate = function(selection, sender){return (Device.current.type === DeviceType.iPhone ||Device.current.type === DeviceType.iPad)};return action;})();
(45-49) Arrays of the project titles and corresponding indexes are generated.
(51-57) The generated arrays are used in the creation of an options menu for the form dialog to be displayed to the user.
(59-63) The form is created, populated with the created options menu item, and displayed to the user in a dialog or sheet (macOS).
(65-67) The form is validated.
(69-124) The results of the form are processes once the user has approved the options menu selection.
(71-72) The user-selected project object is identified as the project to receive the task created by the Shortcuts workflow.
(74-77) The Shortcuts calling URL is generated using the percent-encoded title of the corresponding Shortcuts workflow.
(80-122) The call() function of the URL class is used to generate and execute a call-url targeting the Shortcuts application. The results of the call are processes by either of two provided functions, one for success, and the other for error handling.
(82-83) The passed parameter of the success function is unique task ID string returned by the workflow. It is retrieved and logged.
(86-120) To allow enough time for the importation of the created task and image attachment file into OmniFocus, the post-import processing statements are delayed by placing them within a timer handler. NOTE: by default, the processing delay is set for 3 seconds. If your device requires more time for importing, increase the timer delay value accordingly.
(87-97) Use the passed-in unique task ID to locate the imported task in the OmniFocus database.
(99-111) (optional) Should you wish to apply a set of tags to the new task, add a list of tag titles to the provided blank array. The tags will be generated if they don’t already exist.
(114) Move the new task into the previously chosen project.
(117-188) Use the passed-in task ID to create and open an OmniFocus URL for displaying the created task.
Customizing the Action Plug-In
The example plug-in is easily customizable to suite your needs. Using the provided code as a starting point, you may:
Change the title of the tag used to mark projects as being ready to receive the results of the plug-in. Simply change the string value at line 17 to the title of the tag you wish to use instead.
Change the title and alter the design of the Shortcuts workflow. Just change the string value on line 79 to reflect the correct title of your workflow. IMPORTANT: the call-processing code of the plug-in expects the Shortcuts workflow to 1) create a new task and 2) return as its result, the unique identifier string (Primary Key) of the created task.
Add one or more tags to be applied to the task when it is imported. Enter the desired tag titles to the empty array ([ ]) on line 100. If the tags do not already exist, the routine will create them for you.
Depending on the processing power of the device that is running the plug-in, the amount of the delay (in seconds) entered as the first parameter of the function at line 86, may need to be increased to allow the device more time (in seconds) to add the taken image to the created task.
Running the Plug-In
NOTE: Prior to running the installed action plug-in, make sure you have added a tag titled “Camera-Ready” (without the quotes) to the list of tags in your OmniFocus database. Apply the “Camera-Ready” tag to any project that you wish to use the plug-in to add a new task with image attachment to.
To execute the plug-in, simply select its title from the Omni Automation menu in OmniFocus. The following images detail the steps in the action/workflow process:
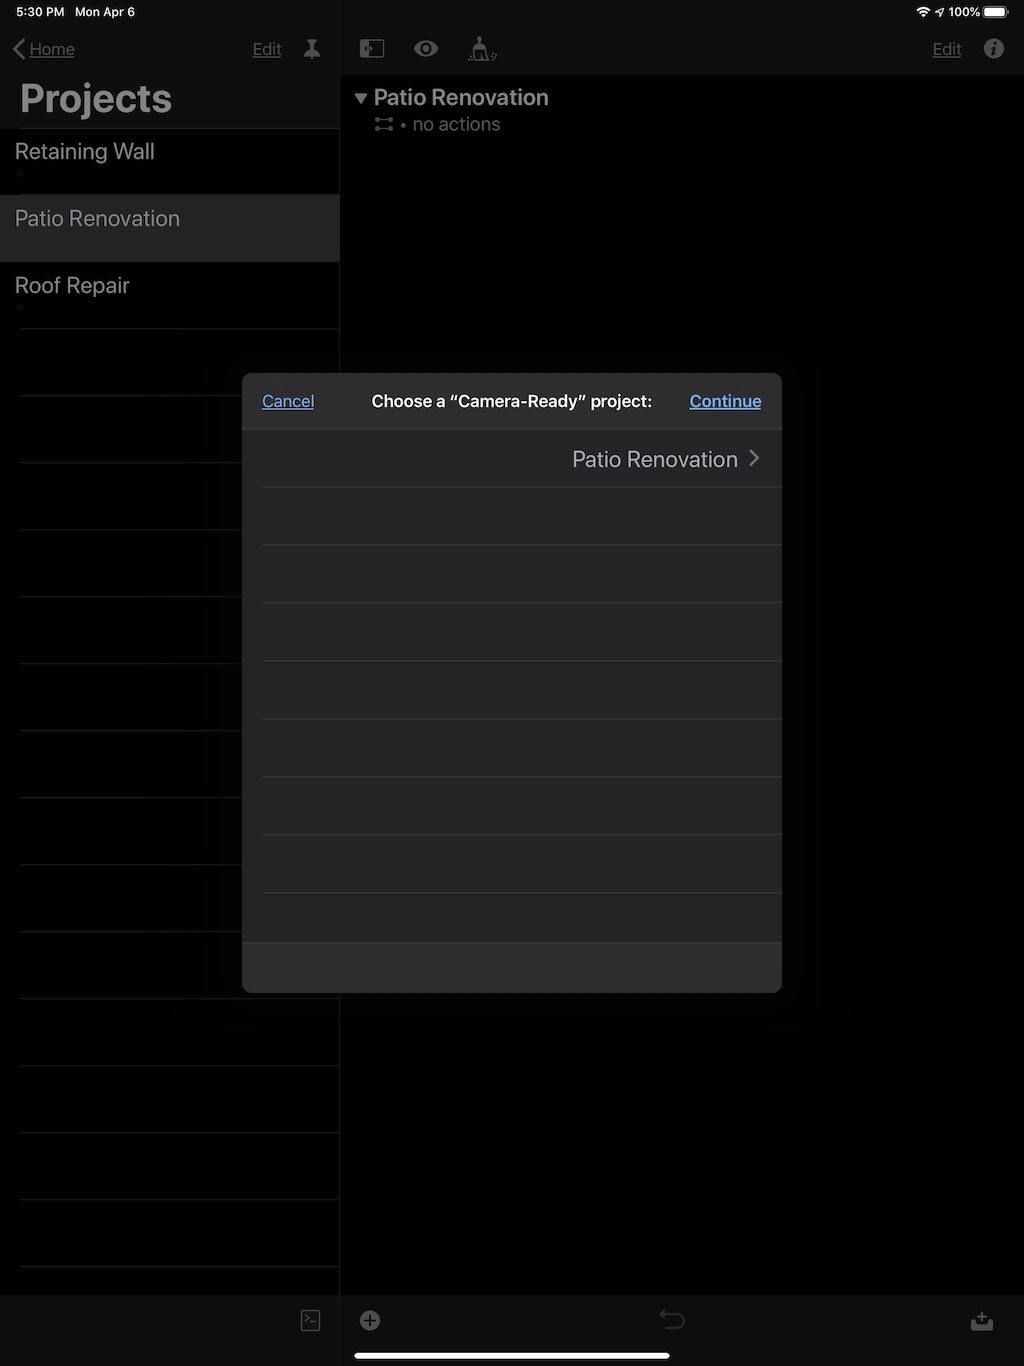
(⬇ see below ) The action form dialog is displayed listing all of the projects currently tagged with the tag: “Camera-Ready”
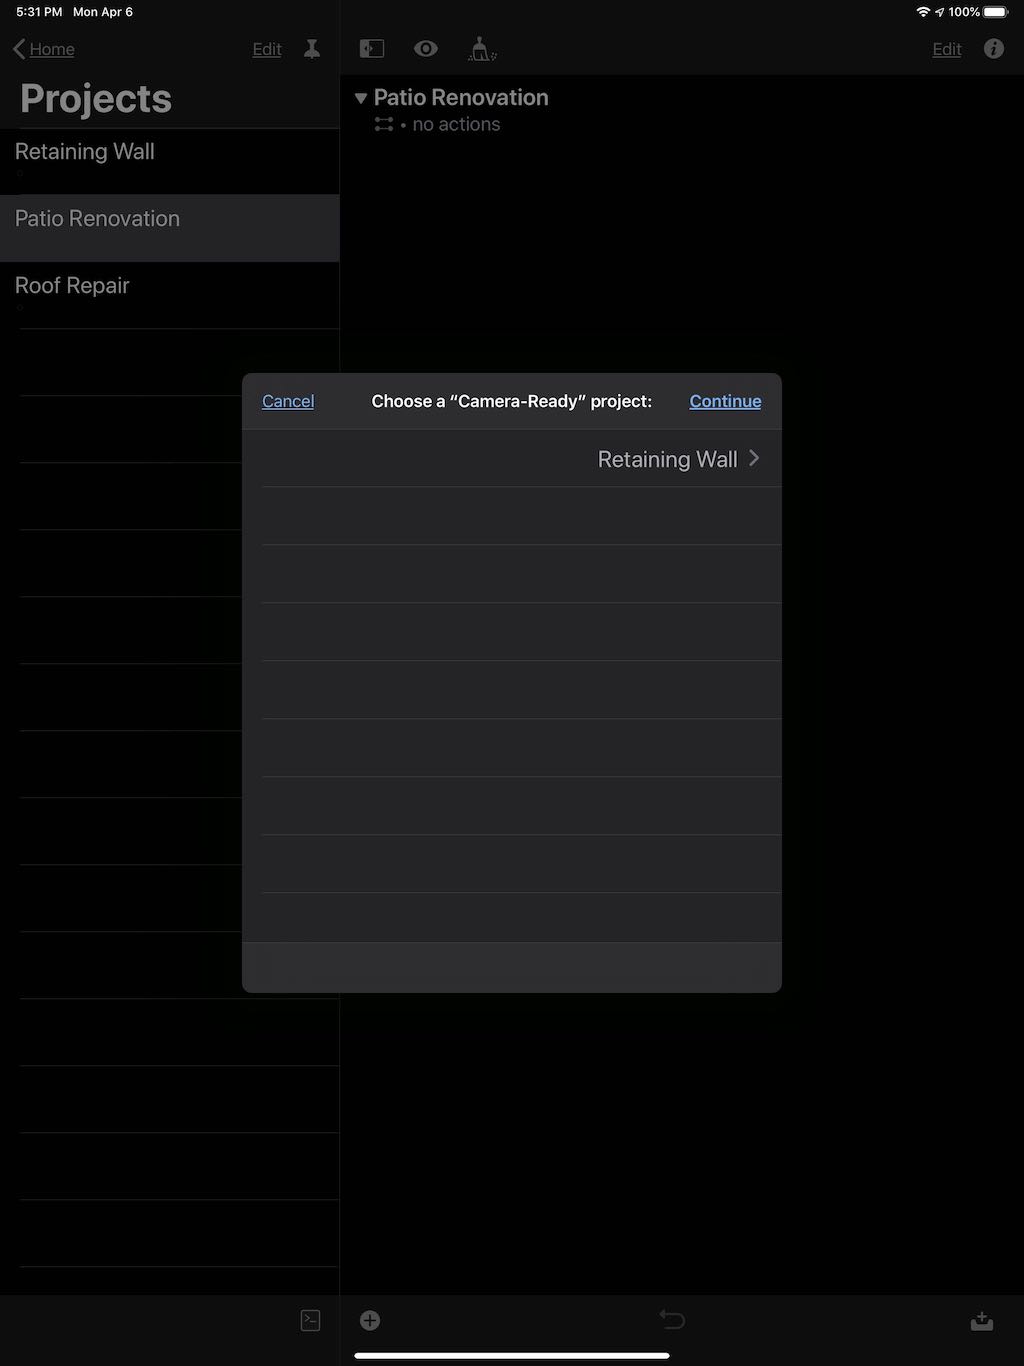
(⬇ see below ) Tapping the current project will display the list of projects that have been tagged with the specified tag. Select the target project from the list.

(⬇ see below ) With the target project chosen, tap “Continue” to run the “Take Pic for New Task” workflow.
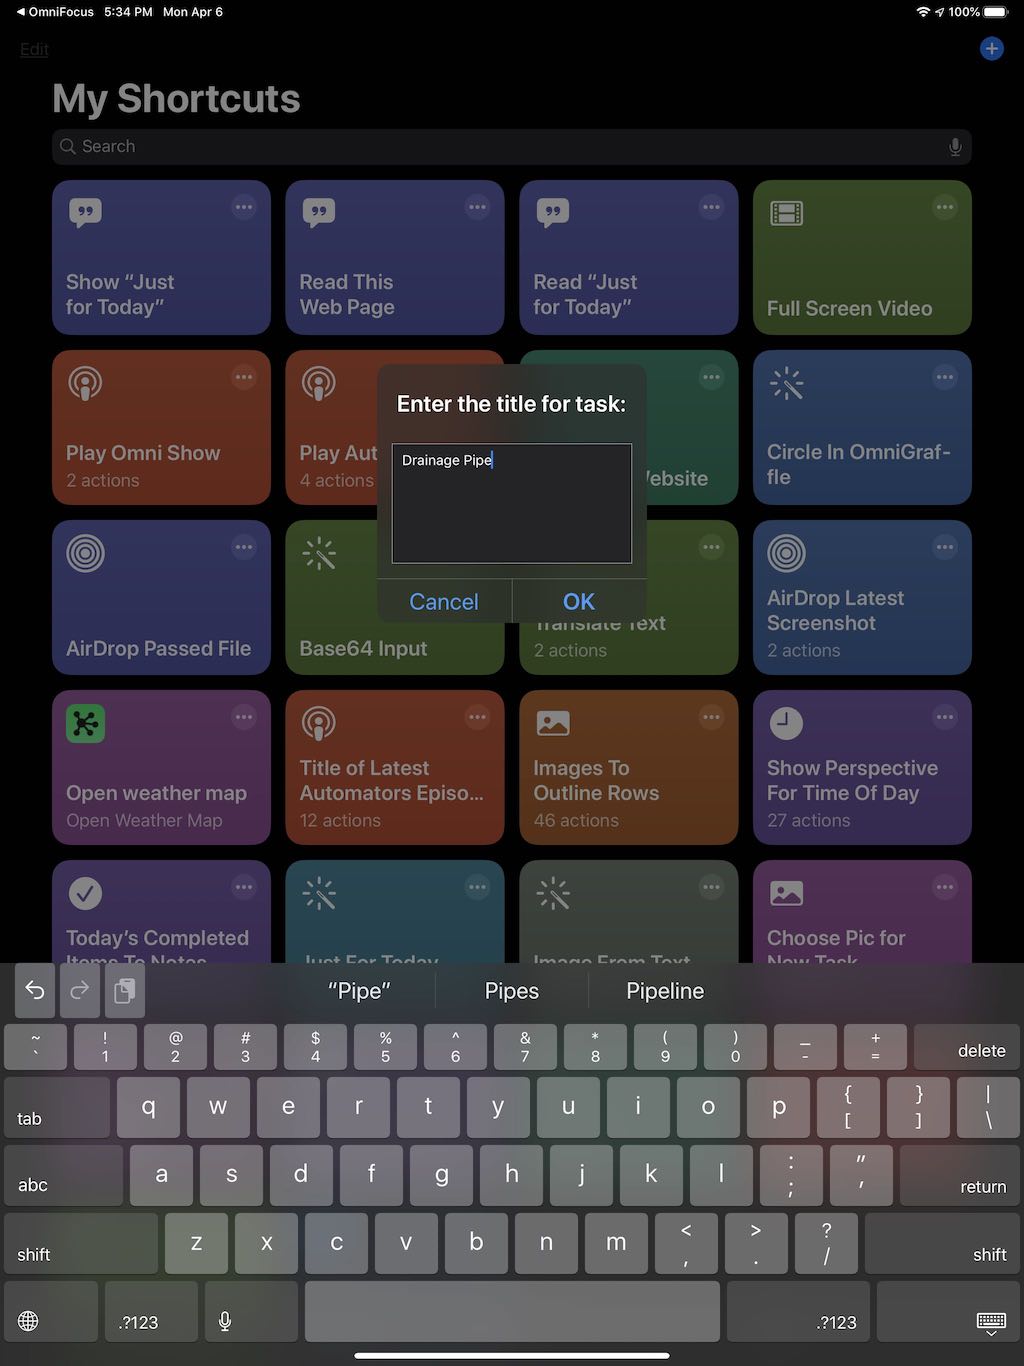
(⬇ see below ) In the prompt dialog, enter the title for the task to be created.
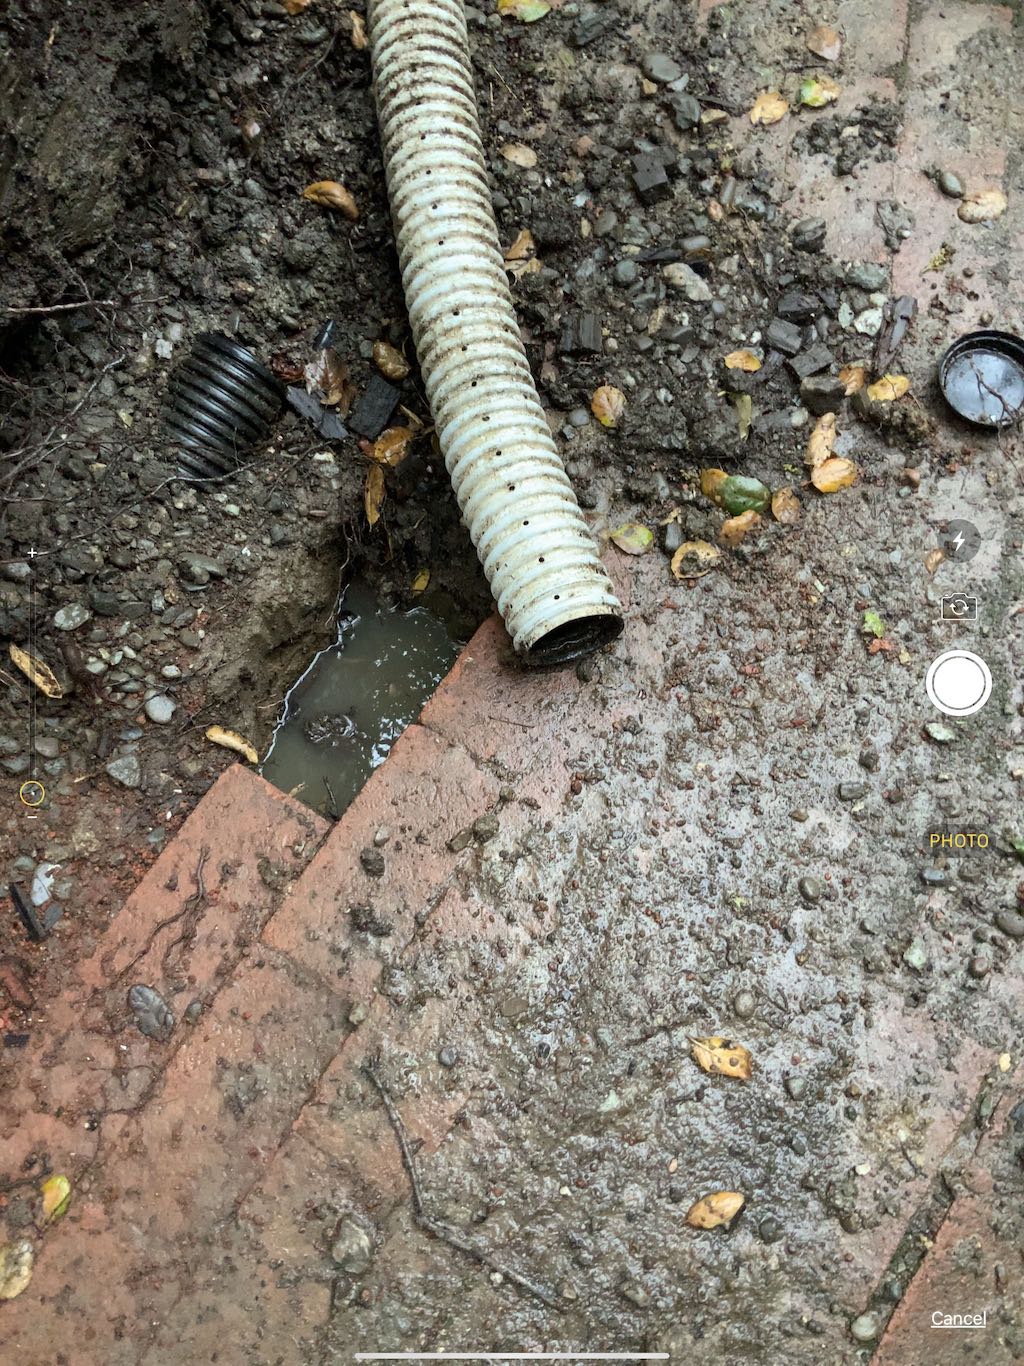
(⬇ see below ) Using the device camera, take the picture to attach to the task.
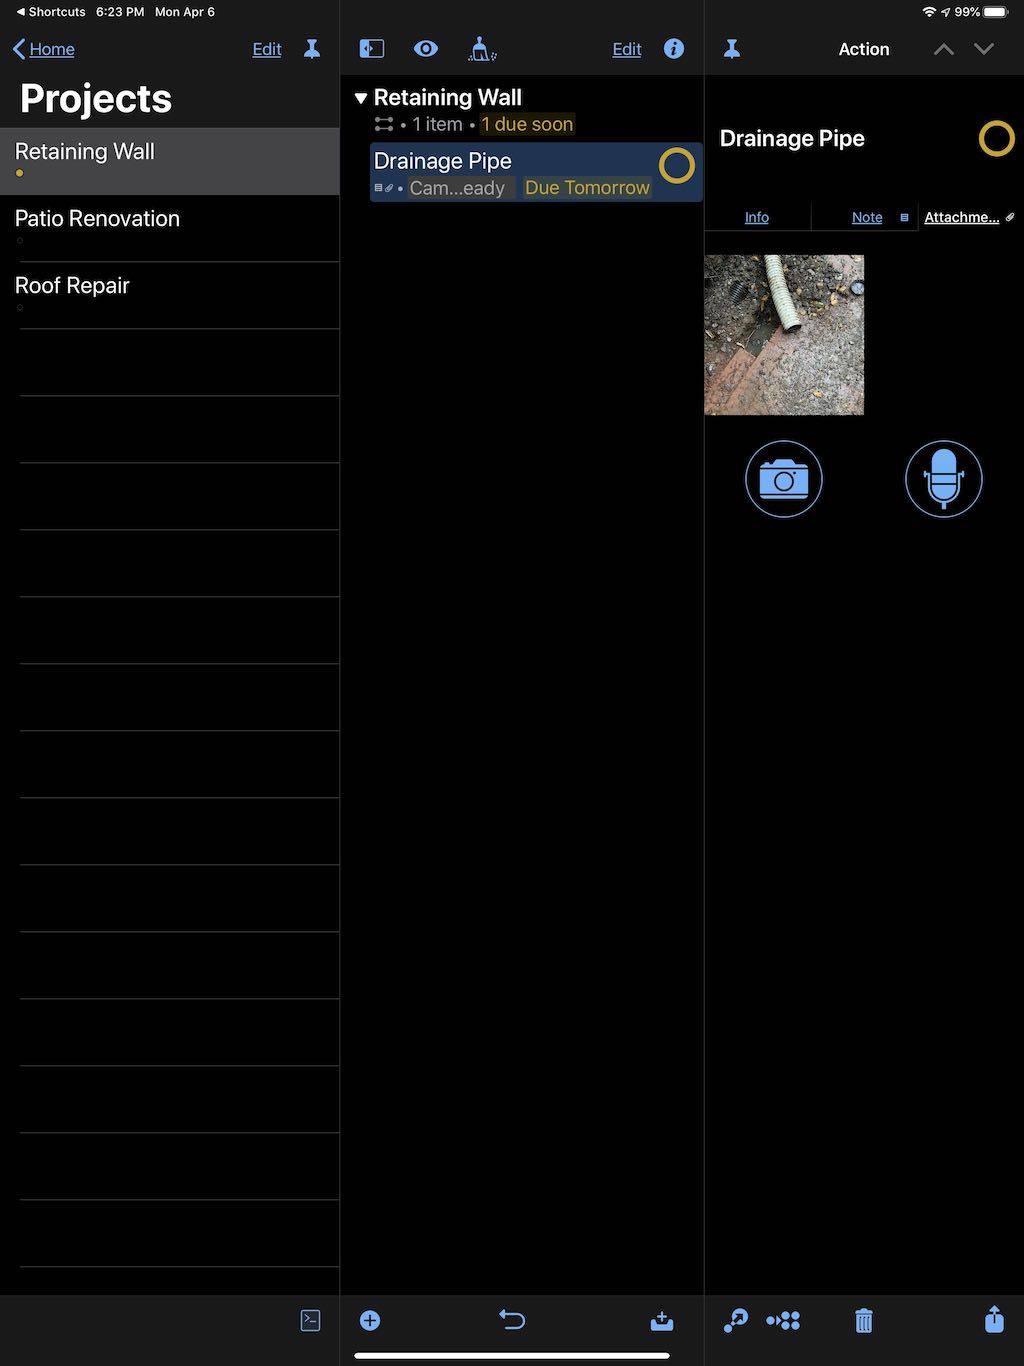
(⬇ see below ) The newly added task is selected in OmniFocus, ready for any further edits.