Managing Omni Automation Plug-Ins on iOS
Omni Automation Plug-Ins and solitary actions are designed to be easily installed and accessed. The following documentation details how to install and manage Omni Automation Plug-Ins locally on your iOS device.
Local Shared Plug-Ins Folder
The following describes how to create a new folder on the iOS device, which will become the linked source folder for the Omni Automation plug-ins used by the Omni applications installed on your iOS device.
The first step is to create a new folder in the file storage area on the device.
NOTE: Even though Omni Automation plug-ins for all of the Omni applications may be stored in the same linked plug-ins folder, they will only be available in the Omni applications that they are designed to work with. This is because each plug-in contains metadata indicating which Omni apps it is intended to be used with. Plug-ins will not appear in apps they are not intended for.
To create a shared folder for Omni Automation plug-ins on your iOS device, perform these steps in the iOS Files app on your device:
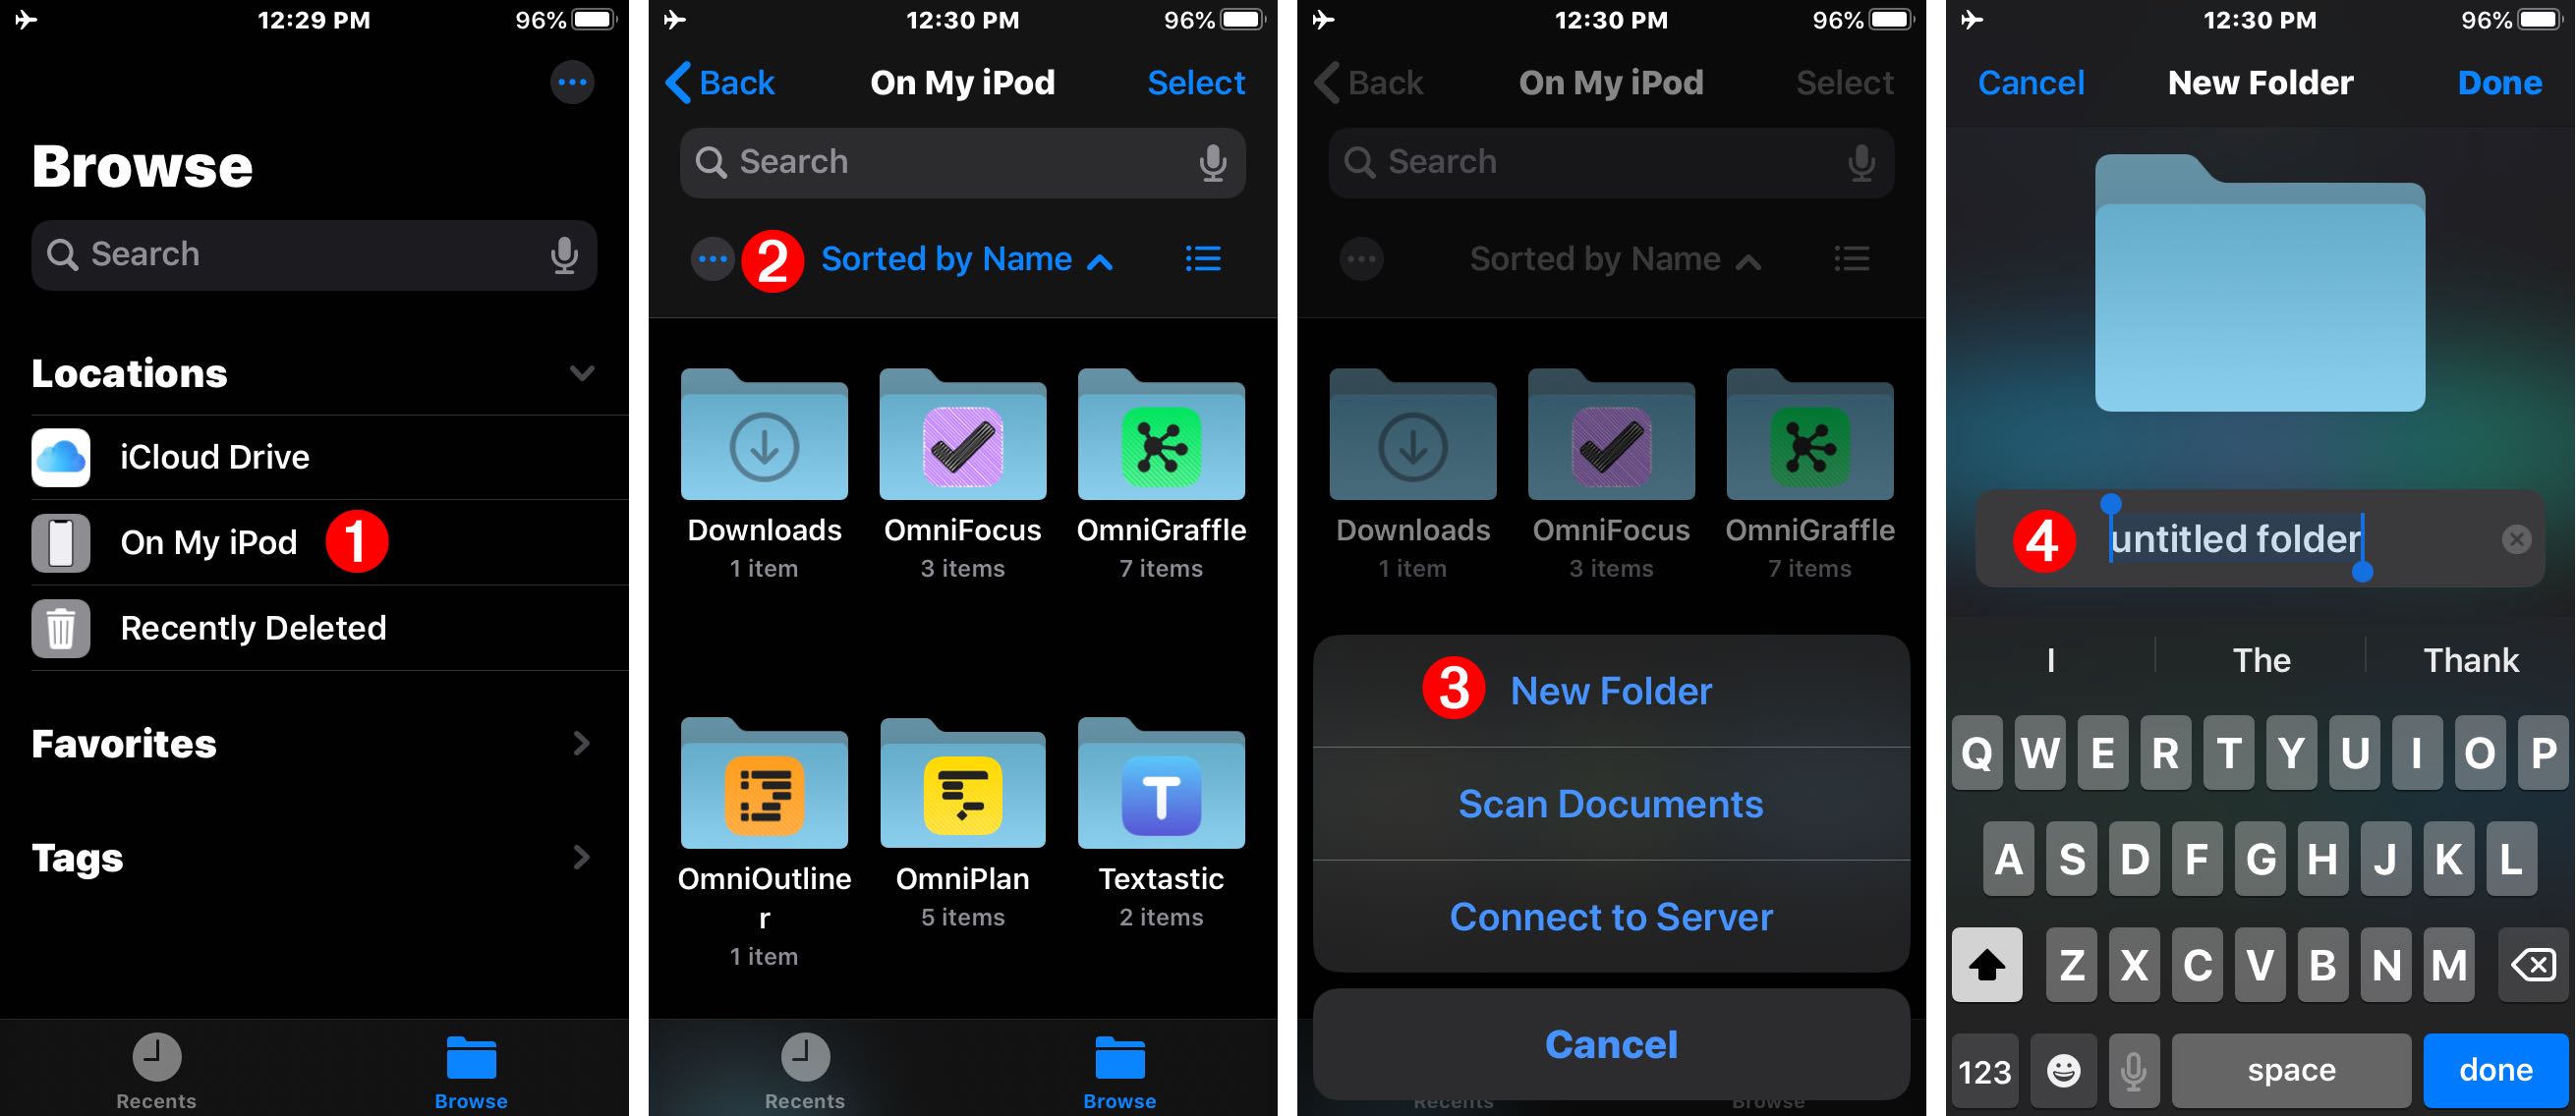
| DO THIS ► | (above) In the Files app, select the “On My iPhone|iPod” 1 location and then tap the New Folder button 2-3 in the forthcoming screen to begin the process of creating a new local directory 4 on the device. |
| DO THIS ► | (below) Enter “Omni Plug-Ins (local)” 1 as the name for the folder, and tap the Done button 2 and the new folder will be created 3 locally on the device. |
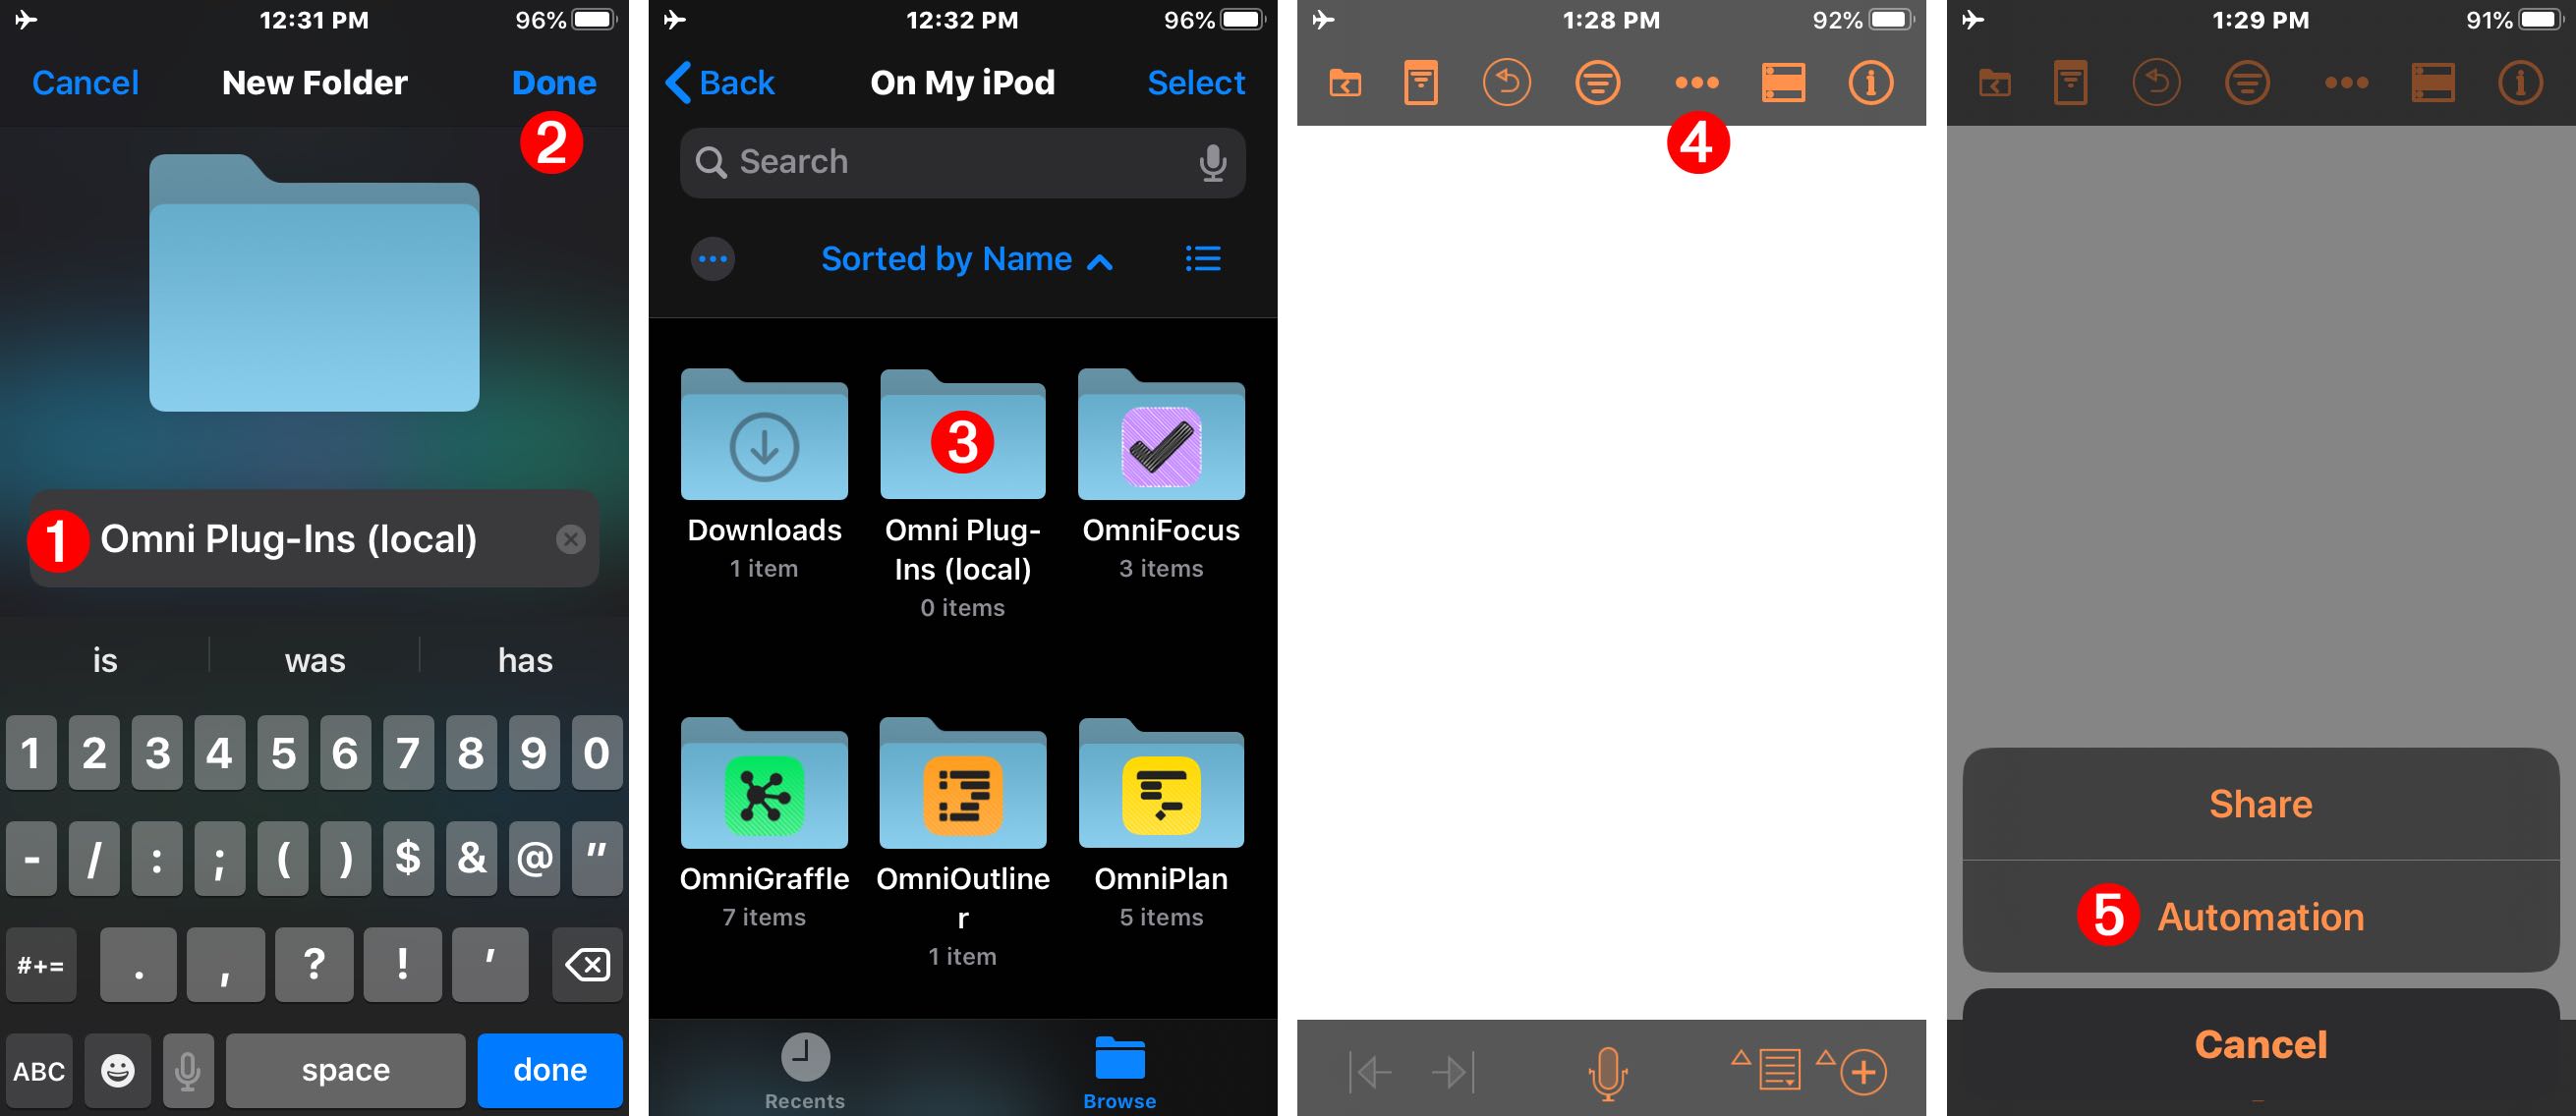
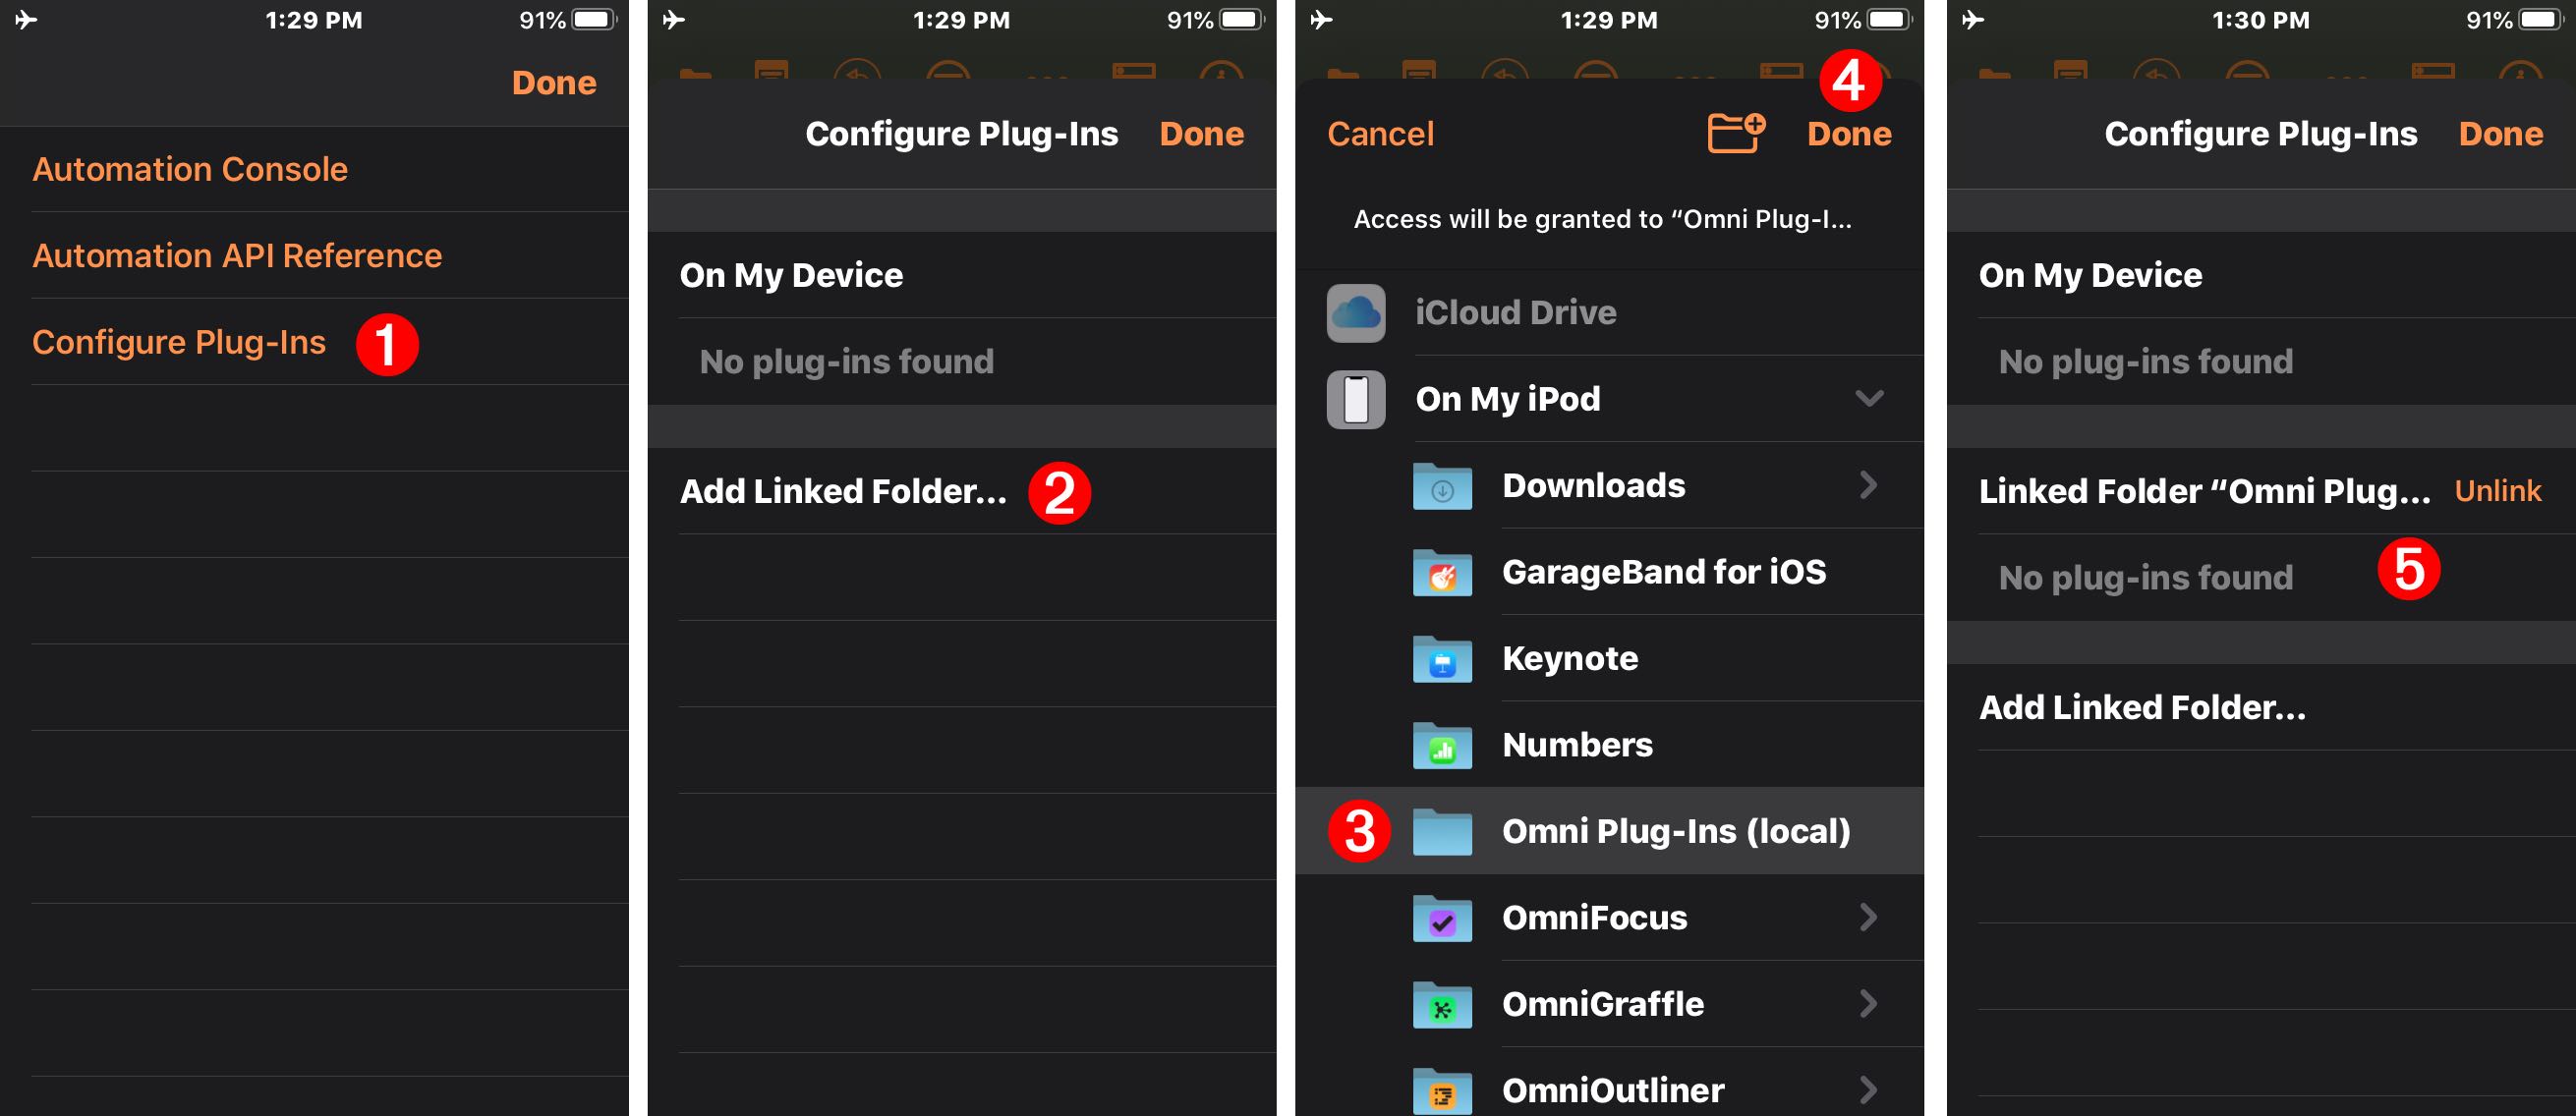
The next step is to identify the created folder as a source folder for Omni Automation Plug-Ins.
| DO THIS ► | (above) In the Omni app (in this example OmniOutliner) display the host app’s Automation menu. 4-5 |
| DO THIS ► | (below) In the Automation menu, tap the “Configure Plug-Ins…” 1 button, and in the forthcoming screen tap the “Add Linked Folder…” 2 menu option. In the file picker sheet select the created “Omni Plug-Ins (local)” 3 folder, tap the Done 4 button, and the new directory will then appear in the Automation configuration panel 5 as a linked folder. Note there is a “Unlink” button should you wish to no longer use the folder as a source for plug-ins. |
The next step is to place your Omni Automation plug-in files within the linked folder.
| DO THIS ► | (below) In the folder containing your Omni Automation plug-in files (in this example the Downloads folder), long-press the unarchived plug-in file 1 to install and select “Move” option 2 from the forthcoming contextual menu. |
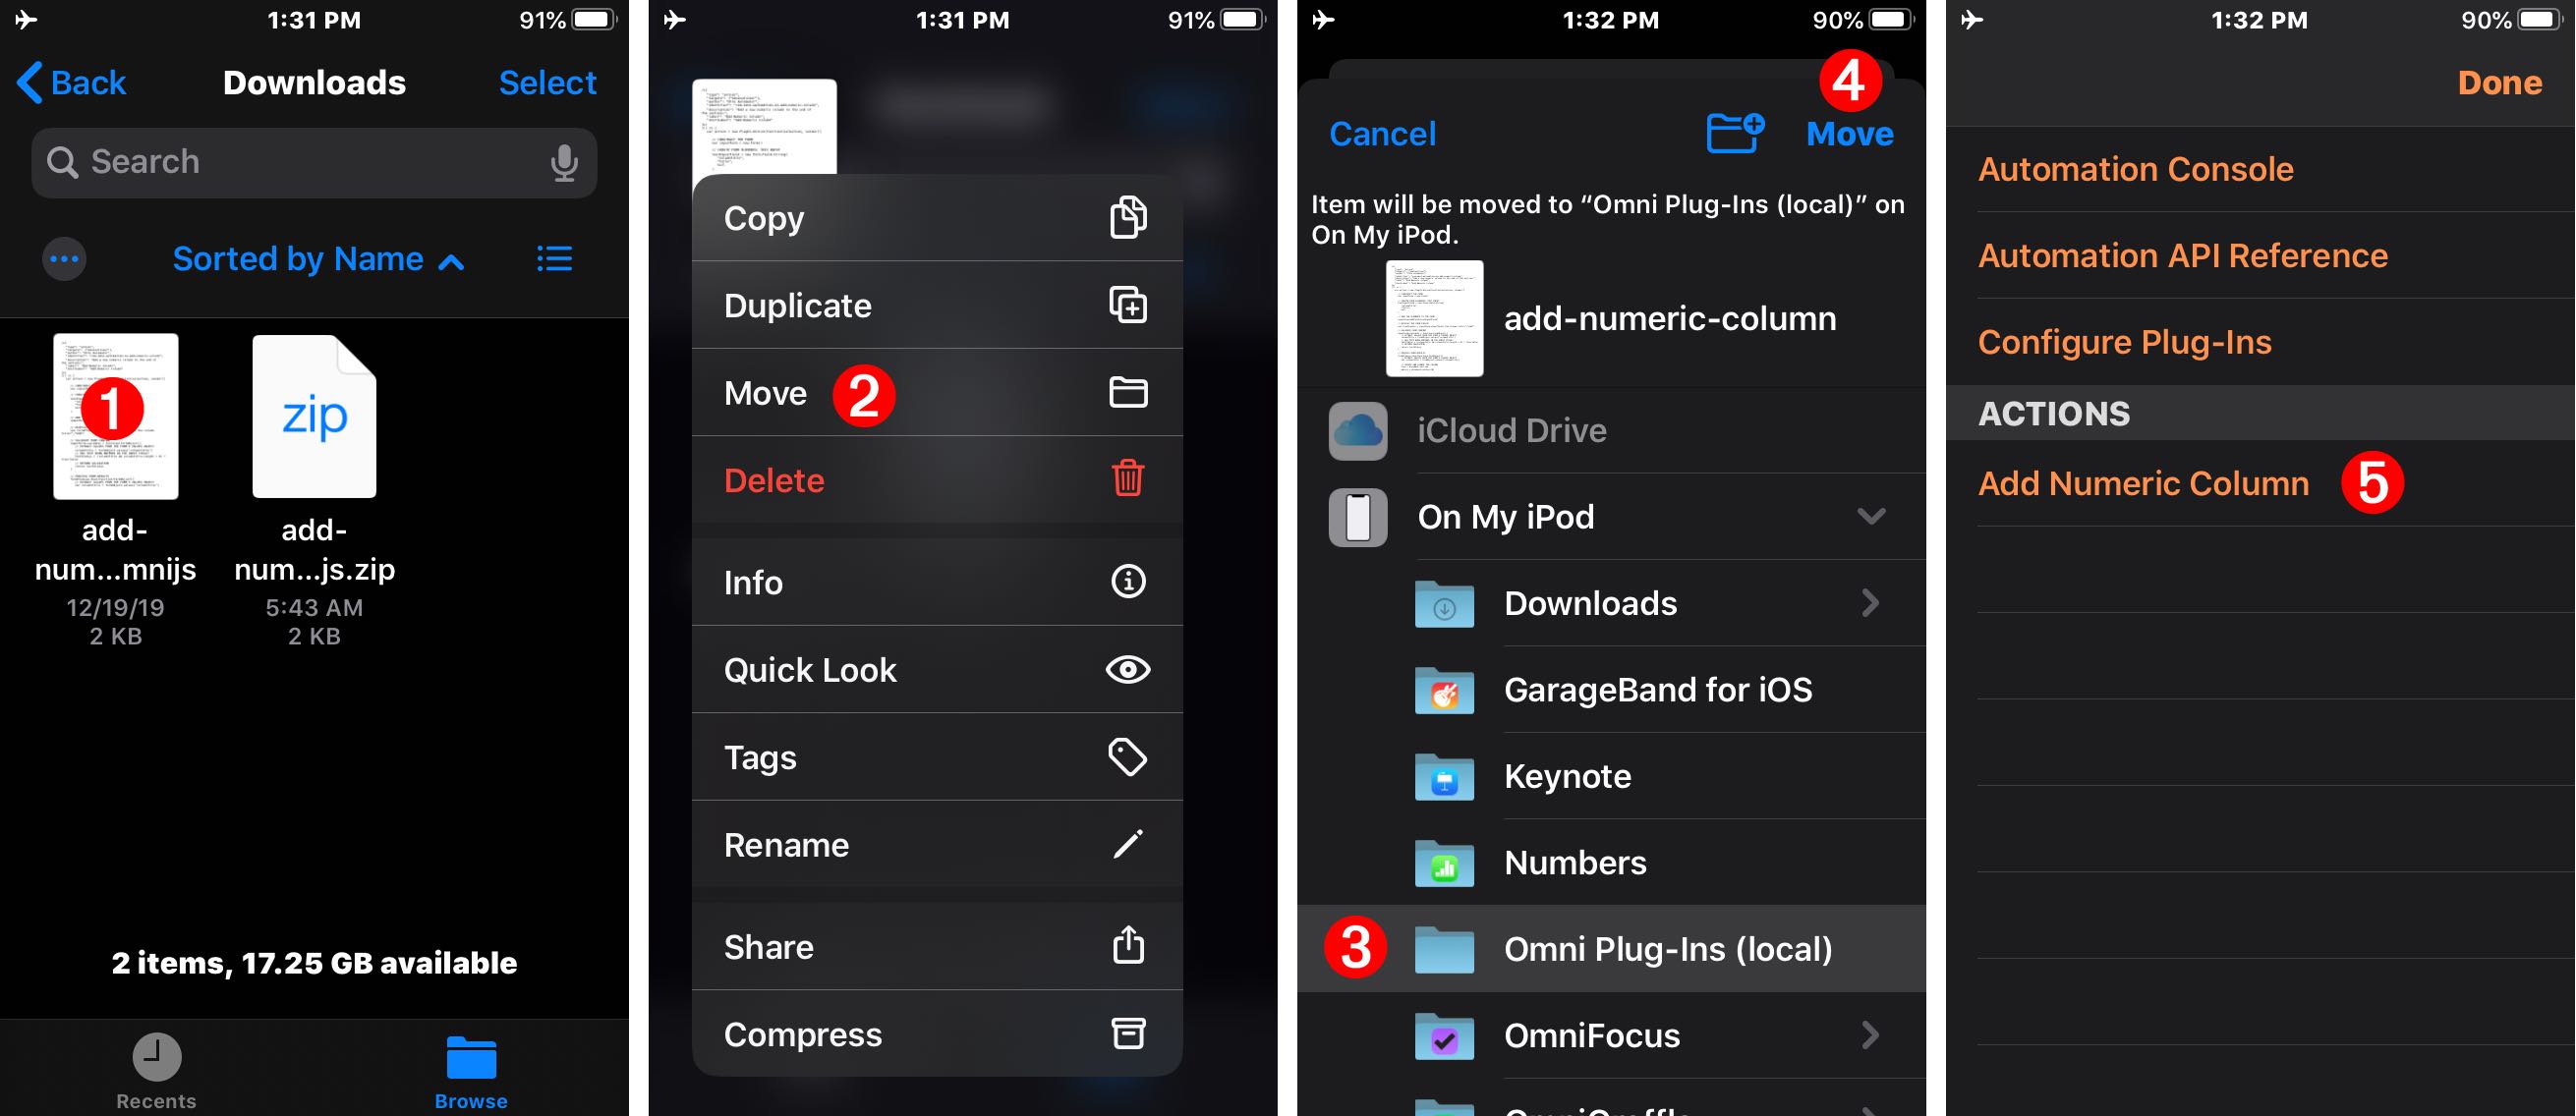
| DO THIS ► | (above) In the file picker sheet select the linked plug-ins folder 3 and tap the “Move” 4 button. The installed Omni Automation plug-in will now be listed 5 in the Omni app’s Automation menu. |
With the local shared plug-ins folder created, you can install new plug-ins by simply moving or copying their files into the shared plug-ins folder. This technique assumes that you’ve used the steps outlined above, to link to the shared plug-ins folder from within each of the Omni apps in which you wish to use Omni Automation plug-ins.
Favorite Folder
To make it easier to navigate to and place items within the local shared plug-ins folder, tag it as a Favorite so that it will appear in the Files sidebar.
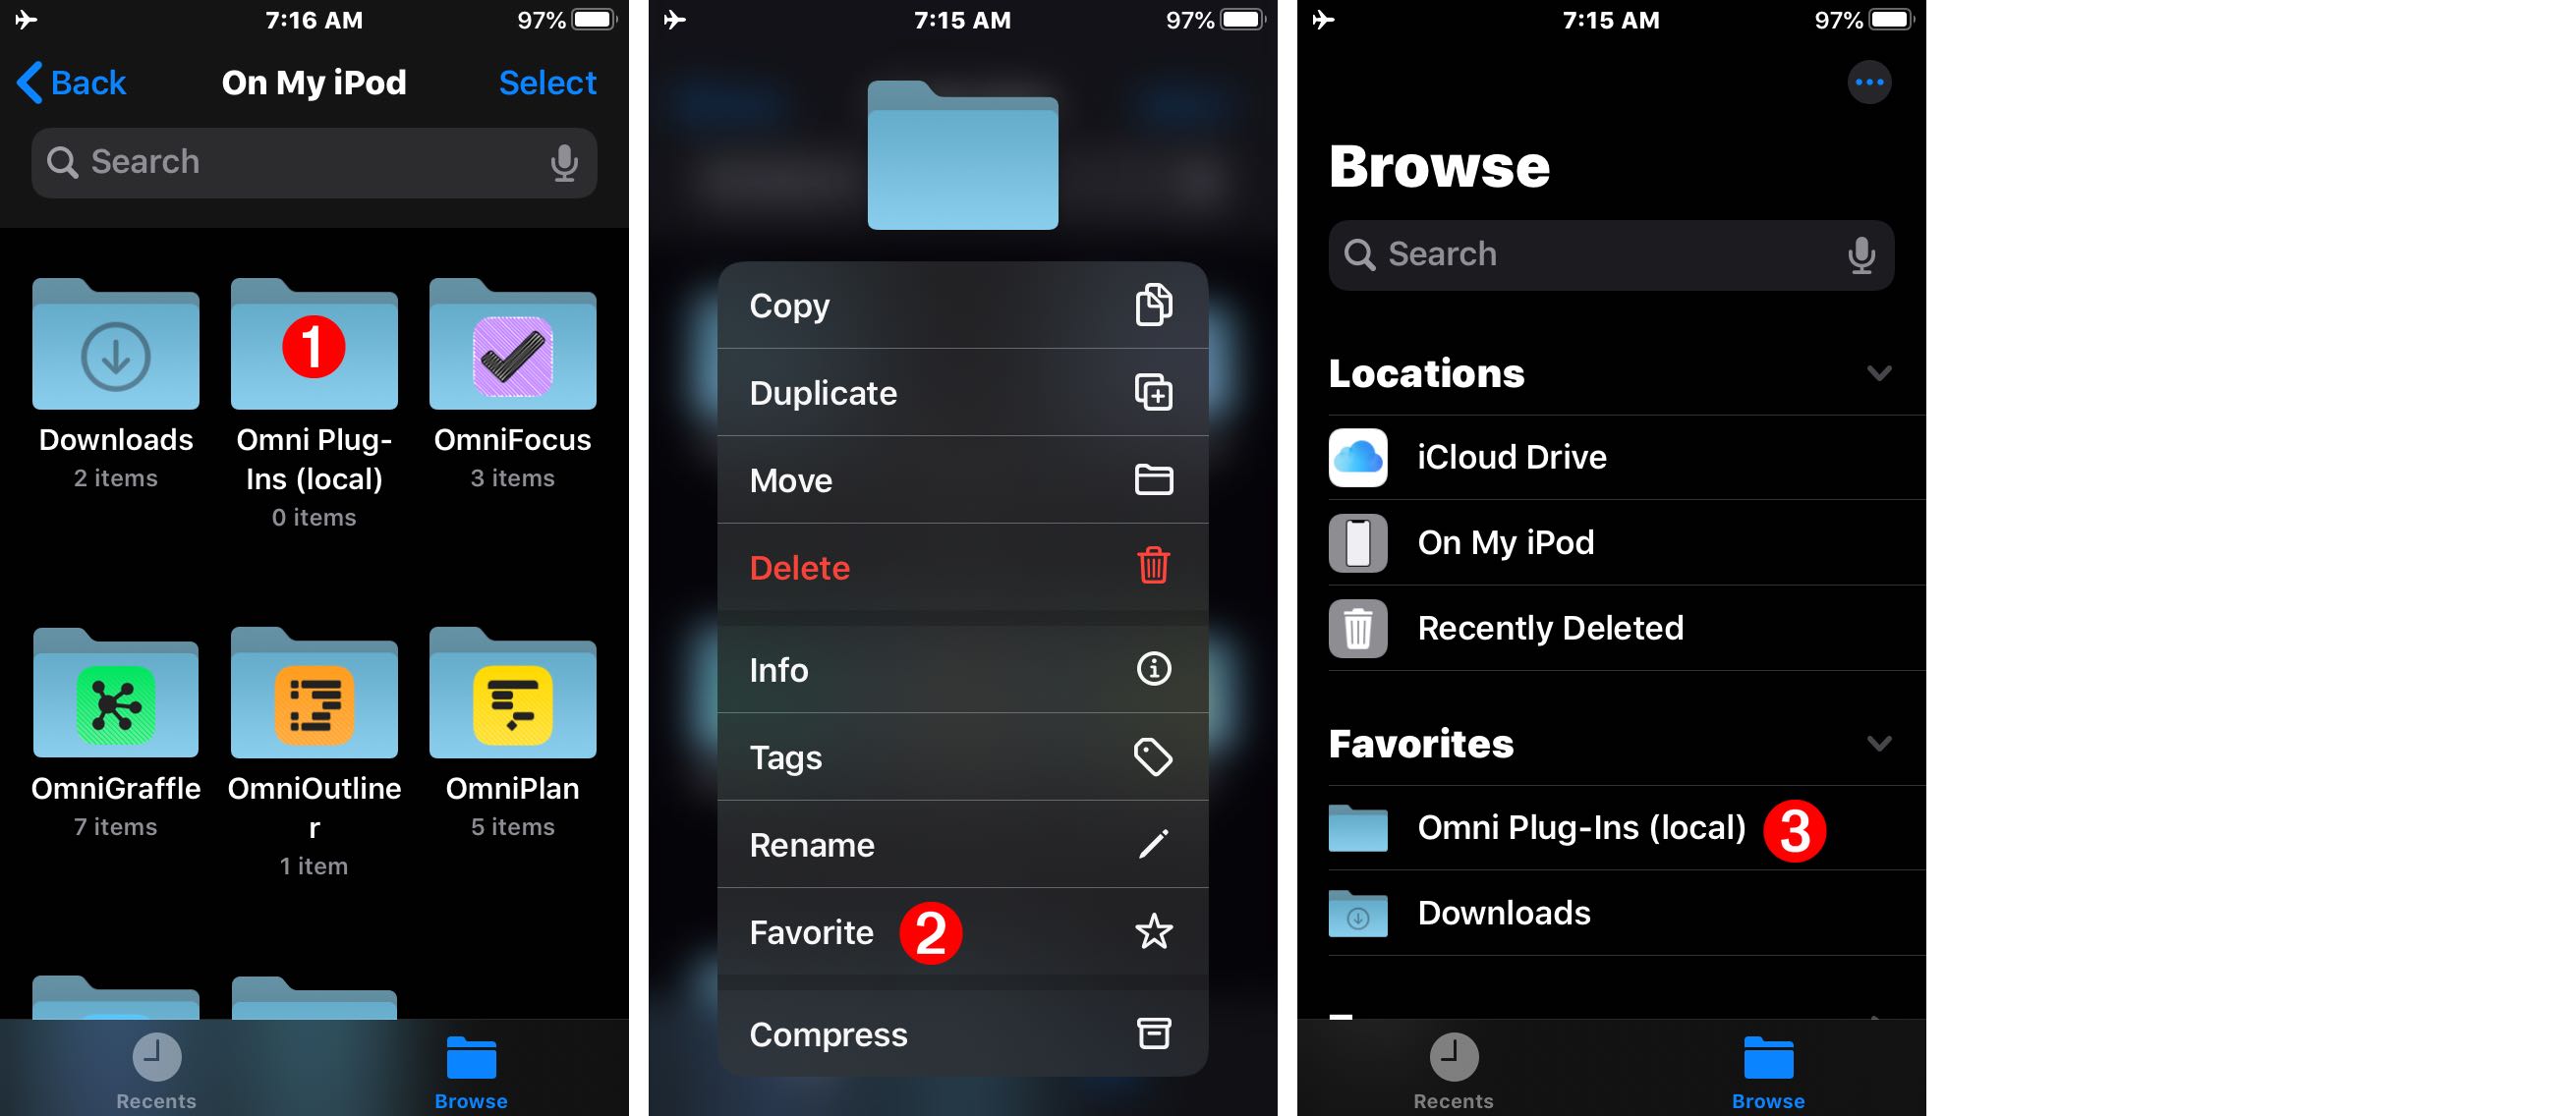
| DO THIS ► | (above) Long-press on the created local shared plug-ins folder 1 to summon the contextual menu. Then select the Favorite 2 menu option. The folder will now appear 3 in the Files Favorites list. |
Removing Plug-Ins
To deactivate a plug-in, remove its corresponding plug-in file from the local shared plug-ins folder.
Plug-In Metadata and Keyboard Assignments
Each installed Omni Automation plug-in contains information about it, and can be assigned its own keyboard shortcut.
| DO THIS ► | (below) To access data and settings for an individual plug-in, select “Configure Plug-Ins” 1 from Omni app’s Automation menu. In the configuration dialog, tap the name of plug-in 2 whose details you wish to to examine. |
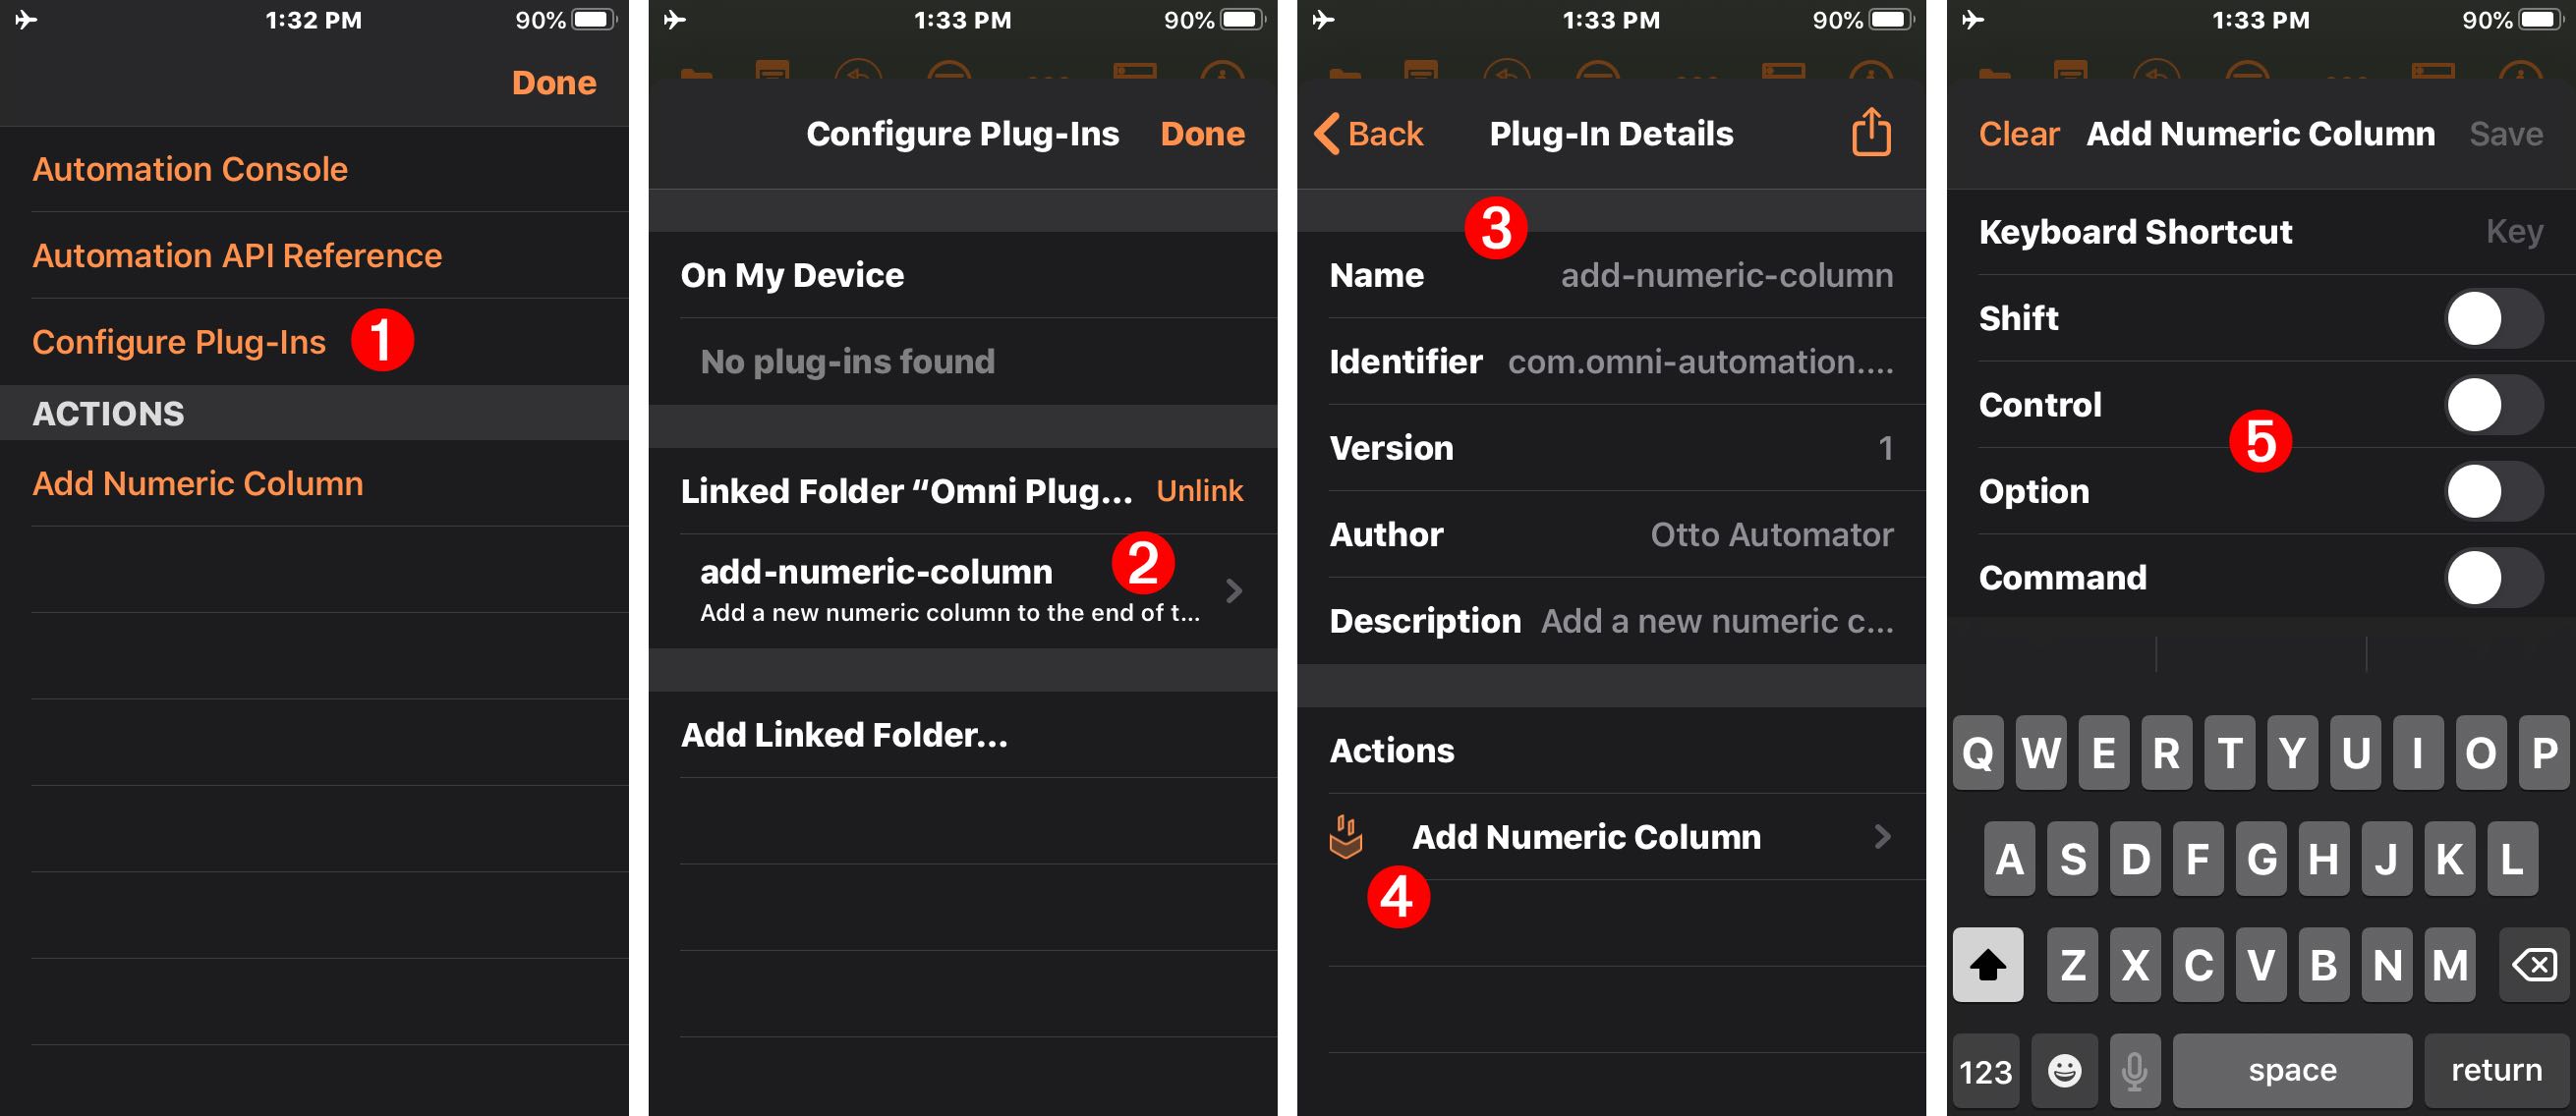
| DO THIS ► | (above) The detail dialog 3 displays information about the plug-in, including the author, version, identifier, and description. Tap the name of one of the plug-in’s actions 4 and a panel for assigning a keyboard shortcut 5 to the selected action, will be displayed. |