Alert
An alert interface for displaying information to the user, blocking further interaction until the alert is dismissed.
Constructor
Alert objects are created using the standard new item constructor:
new Alert(title: String, message: String) → (Alert) • Creates a new alert panel object with the given title and text contents. NOTE: to display the alert panel, the show() function must be called on the created instance.
Instance Functions
There are two functions for use with an instance of the alert class: addOption() for adding titled buttons, and show() for causing the display of the alert dialog.
addOption(string: String) → ( ) • Adds an option button to the alert object.
show(callback: Function or null) → (Promise) • Displays the alert. If no options have yet been added, a default “OK” option is added. Once the user selects an option, the alert is dismissed. If a callback function was supplied, it is invoked with the zero-based index of the selected option as its argument. A Promise is returned as well, which may also be used to collect the result of the Alert.
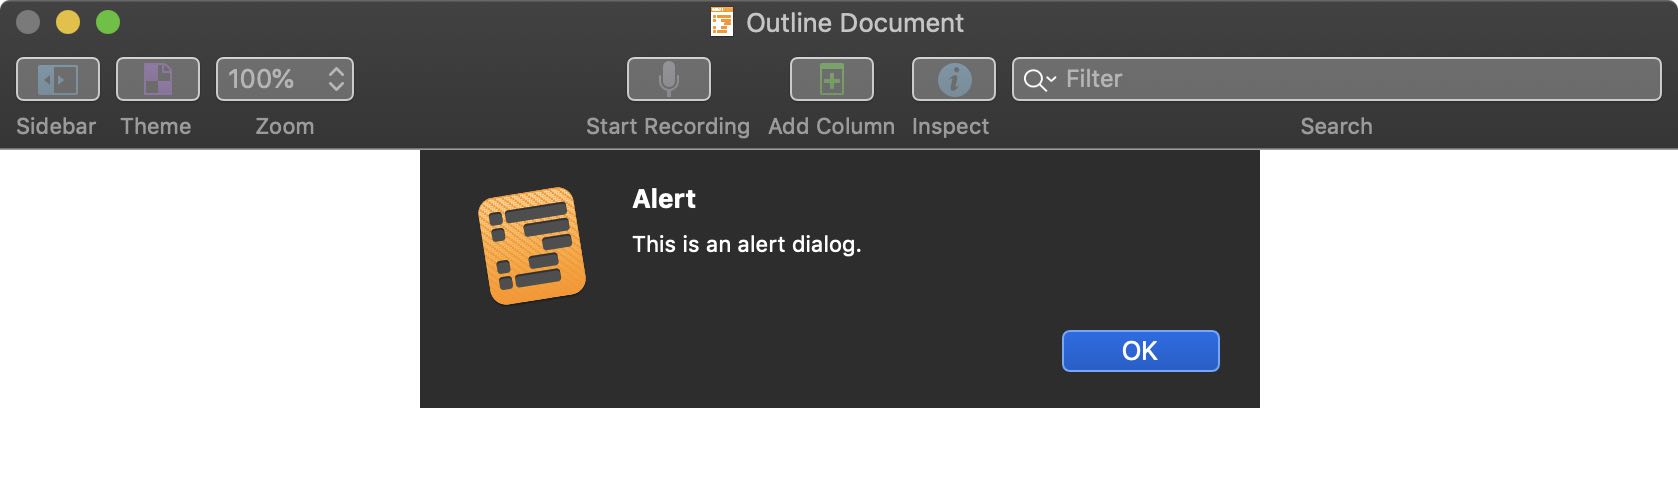
Informational Alert
In the following example, an alert is generated and displayed as an informational dialog that displays the default OK button:
Show an Alert Dialog
alertTitle = "Alert"alertMessage = "This is an alert dialog."alert = new Alert(alertTitle, alertMessage)alert.show()
Alert displayed in OmniOutliner on macOS:
Alert displayed in OmniFocus on iPadOS:

NOTE: When displaying a simple informational alert, is common practice to append the show() function to the end of the alert constructor statement. This technique provides the same functionality as the previous script.
Show an Alert Dialog
alertTitle = "Alert"alertMessage = "This is an alert dialog."new Alert(alertTitle, alertMessage).show()
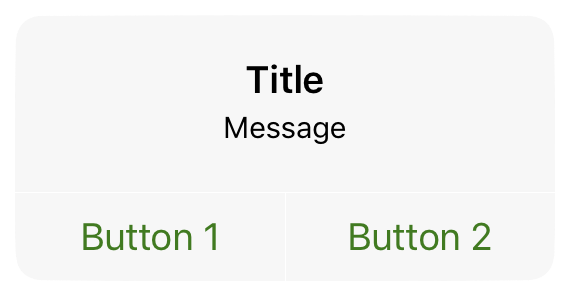
Two-Option Dialog
Well-designed automation tools may, on occasion, require the user to indicate their preference in the way a task is to processed. For example, do they want a new graphic to be created on the current layer or a new layer? The Alert dialog provides a way for the script user to indicate their choice.
An alert dialog may contain up to three buttons (options). To add buttons to the dialog, create and alert object and apply the addOption(buttonTitle: String) method to the alert object. This function takes a single parameter, which is the title displayed in the button.
As mentioned previously, the show() method, which is applied to the alert object, optionally takes a callback function as its parameter. The callback function is passed the result of the dialog, indicated as an integer with 0 being the rightmost button, 1 being the button to its left, and so on.
Inclusion of a simple conditional statement (if…) in the callback function, enables the script to assign an action for each the buttons.
Two-Option Dialog
alertTitle = "Title"alertMessage = "Message"alert = new Alert(alertTitle, alertMessage)alert.addOption("Button 1")alert.addOption("Button 2")alert.show(buttonIndex => {if (buttonIndex === 0){console.log("Button 1")} else {console.log("Button 2")}})
In addition, calling the show() function produces an instance of a JavaScript promise, which can be unpacked using the then() function to process the user choice:
Two-Option Dialog
alertTitle = "Title"alertMessage = "Message"alert = new Alert(alertTitle, alertMessage)alert.addOption("Button 1")alert.addOption("Button 2")alertPromise = alert.show()alertPromise.then(buttonIndex => {if (buttonIndex === 0){console.log("Button 1")} else {console.log("Button 2")}})
And here’s the same example, but calling the alert within an asynchronous function:
Two-Option Dialog (Asynchronous)
(async () => {alertTitle = "Title"alertMessage = "Message"alert = new Alert(alertTitle, alertMessage)alert.addOption("Button 1")alert.addOption("Button 2")buttonIndex = await alert.show()if (buttonIndex === 0){console.log("Button 1")} else {console.log("Button 2")}})();
Alert in macOS:

Alert in iPadOS:
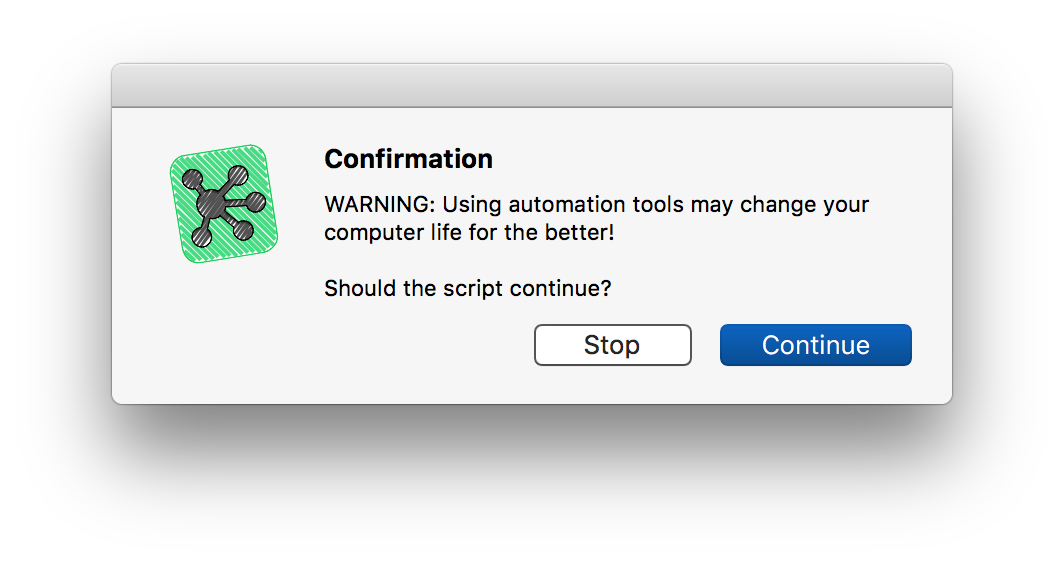
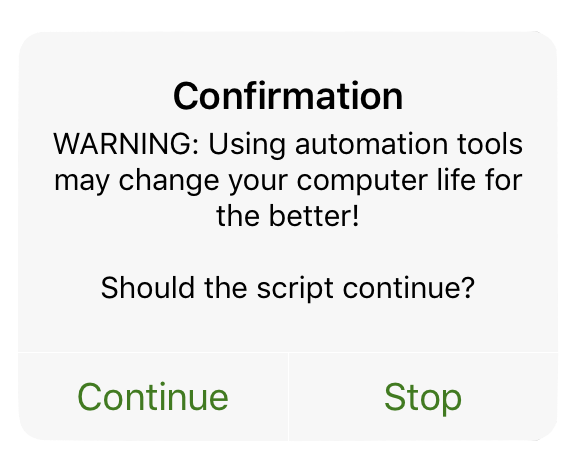
Confirmation Dialog
A basic use of the two-button alert dialog is for displaying a confirmation dialog to the user. If they tap|click the button to stop the script, an error is thrown, otherwise the script continues.
Confirmation Dialog
alertTitle = "Confirmation"alertMessage = "WARNING: Using automation tools may change your computer life for the better!\n\nShould the script continue?"alert = new Alert(alertTitle, alertMessage)alert.addOption("Continue")alert.addOption("Stop")alert.show(buttonIndex => {if (buttonIndex === 0){console.log("Continue script")} else {return}})
In addition, calling the show() function produces an instance of a JavaScript promise, which can be unpacked using the then() function to process the user choice:
Confirmation Dialog
alertTitle = "Confirmation"alertMessage = "WARNING: Using automation tools may change your computer life for the better!\n\nShould the script continue?"alert = new Alert(alertTitle, alertMessage)alert.addOption("Continue")alert.addOption("Stop")alertPromise = alert.show()alertPromise.then(buttonIndex => {if (buttonIndex === 0){console.log("Continue script")} else {return}})
A version wrapped in an asynchronous function:
Confirmation Dialog (Asynchronous)
(async () => {alertTitle = "Confirmation"alertMessage = "WARNING: Using automation tools may change your computer life for the better!\n\nShould the script continue?"alert = new Alert(alertTitle, alertMessage)alert.addOption("Continue")alert.addOption("Stop")buttonIndex = await alert.show()if (buttonIndex === 0){console.log("Continue script")} else {return}})();
Alert in macOS:
Alert in iPadOS:
NOTE: If you haven’t noticed, in macOS, the rightmost button is always the default button, activated via the keyboard (Return or Enter keys).
Three-Option Alert
The 3-button alert dialog is similar to the 2-button alert dialog, with the addition of another option and conditional.
Three-Button Alert
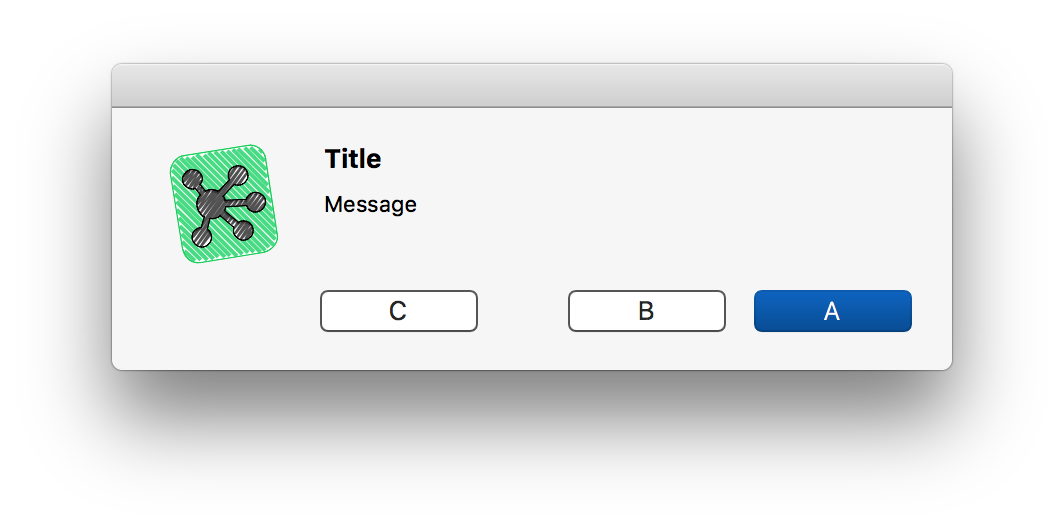
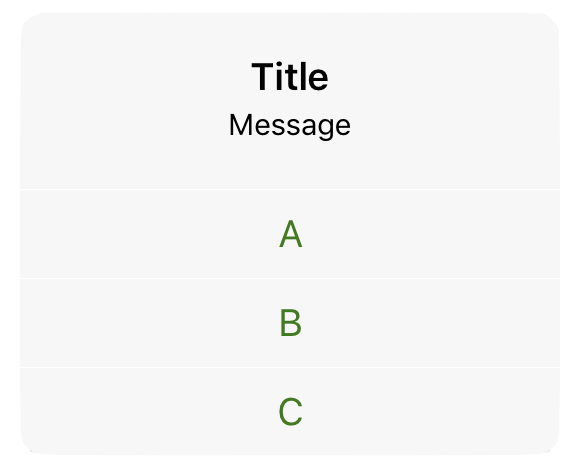
alertTitle = "Title"alertMessage = "Message"alert = new Alert(alertTitle, alertMessage)alert.addOption("A")alert.addOption("B")alert.addOption("C")alertPromise = alert.show()alertPromise.then(buttonIndex => {if (buttonIndex === 0){console.log("A")} else if (buttonIndex === 1){console.log("B")} else {console.log("C")}})
And here’s the same example, but calling the alert within an asynchronous function:
Three-Button Alert (Asynchronous)
(async () => {alertTitle = "Title"alertMessage = "Message"alert = new Alert(alertTitle, alertMessage)alert.addOption("A")alert.addOption("B")alert.addOption("C")buttonIndex = await alert.show()if (buttonIndex === 0){console.log("A")} else if (buttonIndex === 1){console.log("B")} else {console.log("C")}})();
Alert in macOS:
Alert in iPadOS:
The 3-button alert dialog is often used to present an either/or choice with the option to stop the script.
3-Button: Graphic Placement
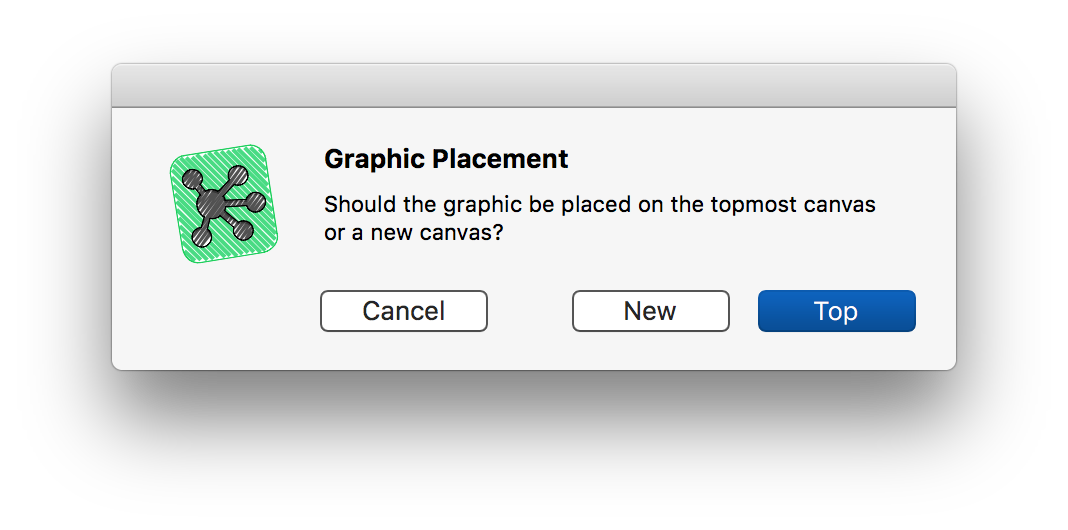
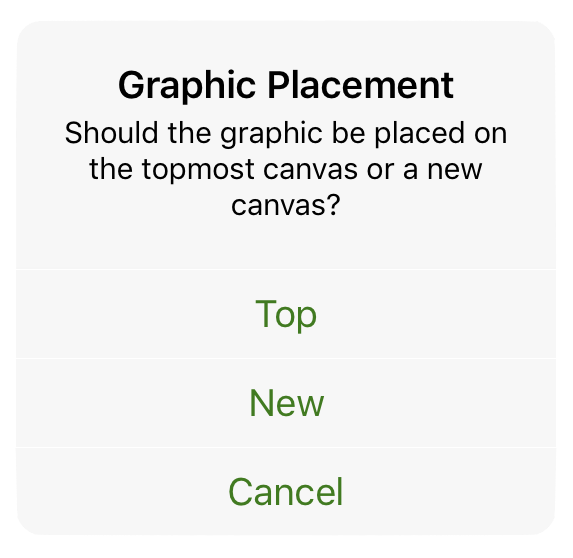
alertTitle = "Graphic Placement"alertMessage = "Should the graphic be placed on the current canvas or a new canvas?"alert = new Alert(alertTitle, alertMessage)alert.addOption("Current")alert.addOption("New")alert.addOption("Cancel")alertPromise = alert.show()alertPromise.then(buttonIndex => {aRect = new Rect(0, 0, 200, 200)if (buttonIndex === 0){cnvs = document.windows[0].selection.canvascnvs.addShape('Circle', aRect)} else if (buttonIndex === 1){cnvs = addCanvas()cnvs.addShape('Circle', aRect)} else {throw new Error('script cancelled')}})
Alert in macOS:
Alert in iPadOS:
Summary
The Alert object and show() method are very useful tools for a scripter. In general, it is good scripting design to include confirmation or introductory alerts in scripts (actions) distributed to the general public. For scripts used internally by yourself or within your organization, alerts remain a valuable option. After all, a well-placed Cancel button can save you from having to undo!